How to Hike the O Circuit in Torres del Paine National Park: The Complete Planning Guide
Are you wondering how to plan for the O Circuit in Torres del Paine National Park? Then you’ve come to the right spot! In this comprehensive guide, we’ll go over everything you need to know to hike the O Circuit in Patagonia, including how to book campsites on the O Circuit, how much it will cost to hike the O Circuit, the best time to go, how to get there, how long and hard the O Circuit is, the best O Circuit itinerary, and much more!

The O Circuit of Torres del Paine National Park was a huge bucket list item on our (ever-growing) list of hikes for quite some time. And we were so excited to be able to finally check it off!
If you don’t know what the O Circuit is, allow us to introduce it to you (and be prepared to add it to your list, too)…
The O Circuit (also often called the O Trek) is a multiday backpacking trip through the incredibly scenic landscape of Patagonia.
Patagonia is a region encompassing the southern tips of both Chile and Argentina, and is home to some of the most gorgeous and jaw-dropping mountain scenery on the planet (seriously…it’s pretty freakin’ epic). The O Circuit in particular traverses through Torres del Paine National Park in southern Chile (known for its three iconic granite peaks that the park is named after- and that you’ll see on the O Trek!). Aside from the slightly easier W Trek (another amazing hike in the park), the O Circuit is one of the most popular hikes in Patagonia, and considered one of the most scenic hikes in the world.
While hiking along the roughly 70 miles of the O Circuit, you’ll get to admire the impressive and jagged peaks of the Cordillera del Paine massif, trek by some massive glaciers and icefields, walk along stunningly blue lakes, cross wobbly suspension bridges, and of course, set eyes on the park’s famous Torres del Paine.
While the O Circuit might be high on a lot of people’s bucket lists, there are a few things that make hiking the O Circuit a little bit…complicated.
First, the O Circuit is hard. While there’s nothing really technical or overly challenging to it, the O Trek is quite simply just a long trail with lots of elevation gain. It takes an average of 8 days to hike the O Circuit, which is a long time to devote to a single trail and to be wearing a heavy backpack. Luckily, there are ways to make it easier (but also much more expensive!) which we’ll go over later.
Second, the O Circuit is popular. Understandably. But that means planning for the O Circuit months in advance is key to securing the necessary campsites and accommodations.
Finally, the O Circuit hike can be a bit overwhelming to plan. You have to figure out your ideal hiking itinerary, like where to start and how much hiking you want to do each day, then plan out which campsites to stay in, book them (and spoiler alert: there are a couple of different companies you have to go through for this!), figure out costs, and coordinate all your transportation to and from Torres del Paine National Park.
It’s a lot of work for a hike- but trust us when we say the effort is all worth it. And, we’re here to help!
We were in your spot once upon a time- quite overwhelmed and getting just tidbits of information here and there. So, we created this guide to put everything you need to know about hiking the O Circuit in Torres del Paine all in one place! In this O Circuit guide, we’ll go over all the logistics of planning a trek on the O Circuit, including how to get to Torres del Paine, the best time to go, where to start the O Trek, how many days you’ll need, how to plan your O Circuit itinerary, how to book O Circuit campsites, details about the trail, and much more!
So, let’s get to it! This is a long guide, so feel free to jump around as needed.
In this O Circuit hiking guide:
O Circuit Overview
The O Circuit is a multiday backpacking trip that circles around the entire Cordillera del Paine massif in Torres del Paine National Park in Chile. It typically takes between 7 to 9 days to complete.
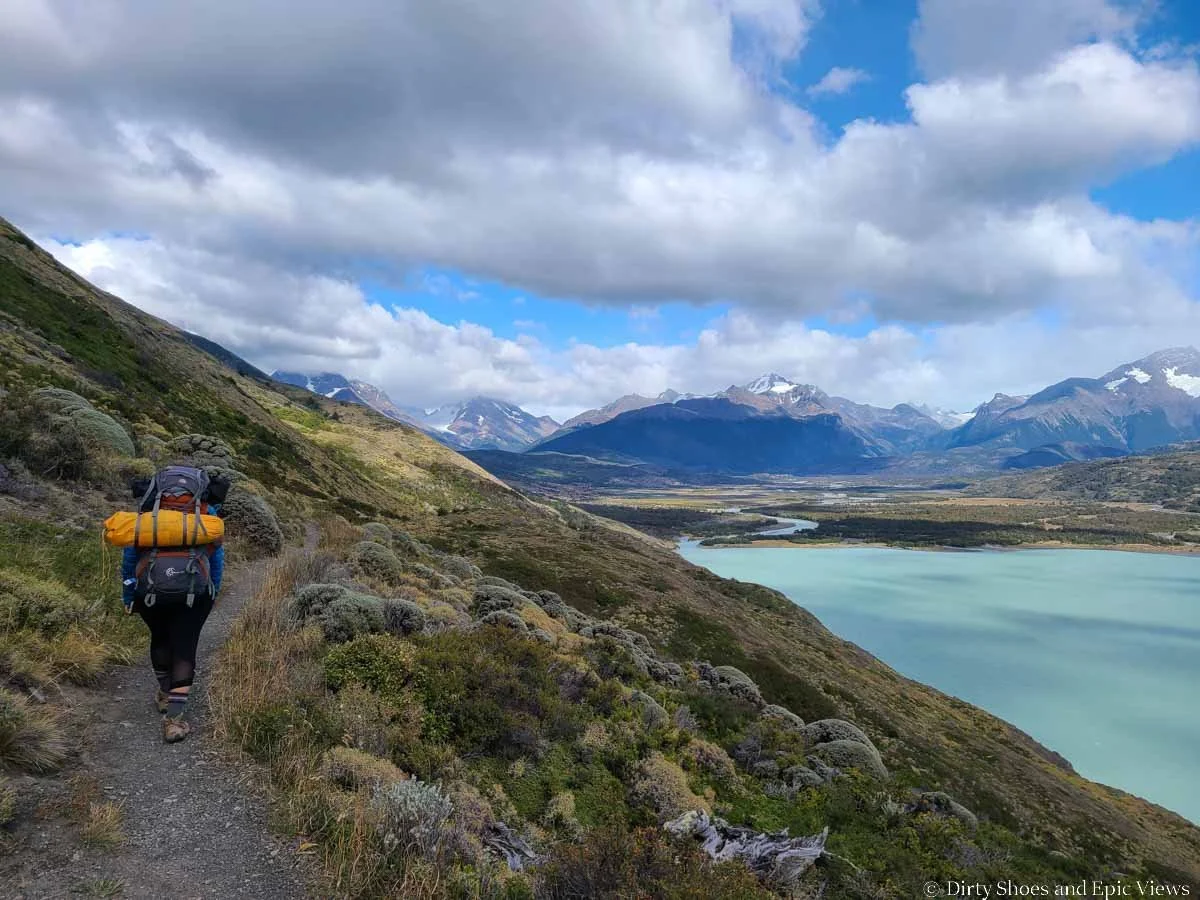
Epic views along the O Circuit
Along the trail are various campsites and refuges to spend each night. These accommodations allow you to make the O Circuit as easy or as challenging as you wish. You can choose to truly backpack the trail, carrying all your own gear for camping and carrying in and cooking all your own food. Or, you can pay the higher price to sleep in beds in the refuges, or to have the camping gear all set up for you at each campsite. You can also pay for food at each campsite/refuge so that you don’t have to carry up to 9 days worth of food on the trail, making your pack much lighter. We’ll get into all these logistics in just a bit.

Camping on the O Circuit
As you hike around the O Circuit, one of the main highlights of the trek includes climbing the infamous John Gardner Pass, a rocky ascent of 650 meters (or 2,100 feet) to the 1,200 m (3,900 foot) pass- the highest pass in the park. From here, there are absolutely stunning views of the largest glacier in the park- Grey Glacier, which stretches 6 km wide and 19 km long, and drops down from the Southern Patagonia Ice Cap, which you also might be able to see running across the mountain tops. Trust us when we say your jaw will literally drop when you crest over the pass and see Grey Glacier for the first time.
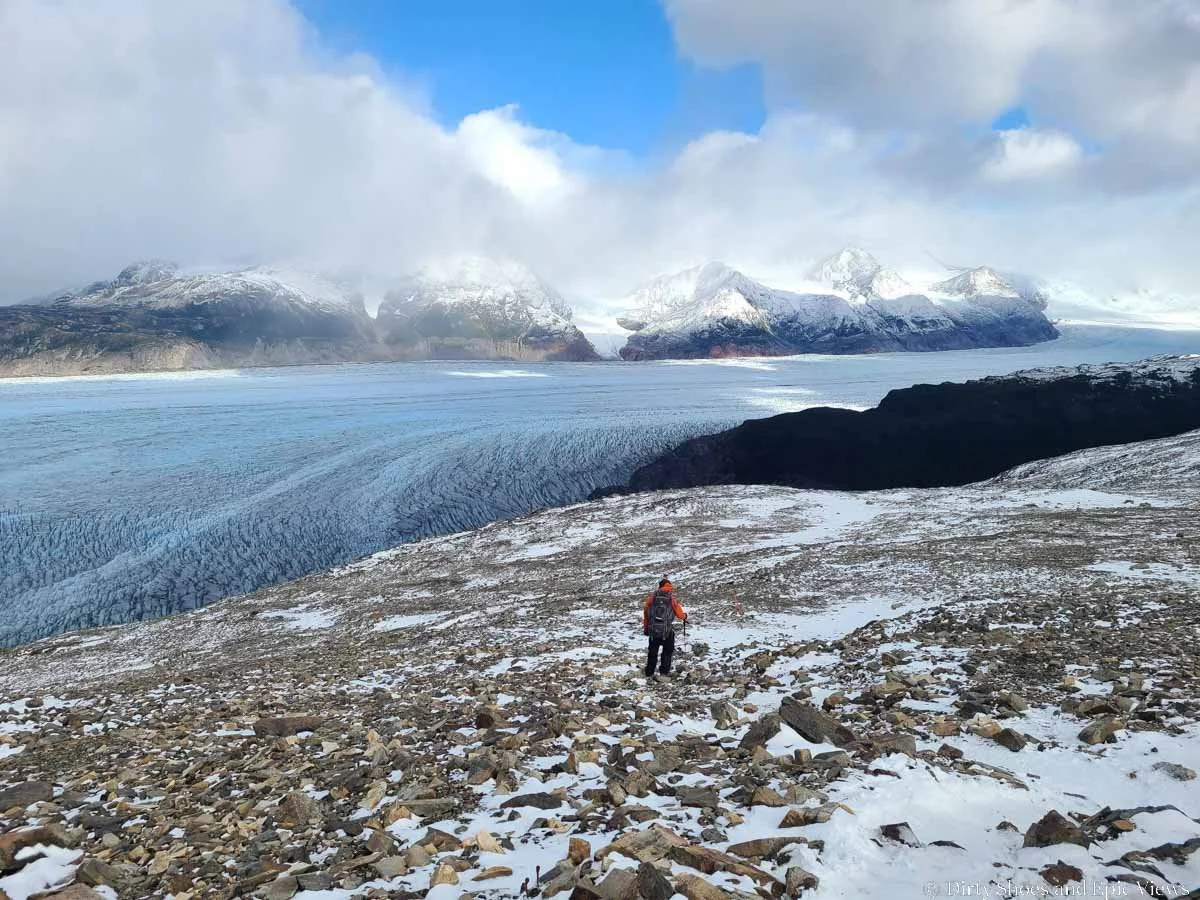
Hiking over the epic John Gardner Pass on the O Circuit
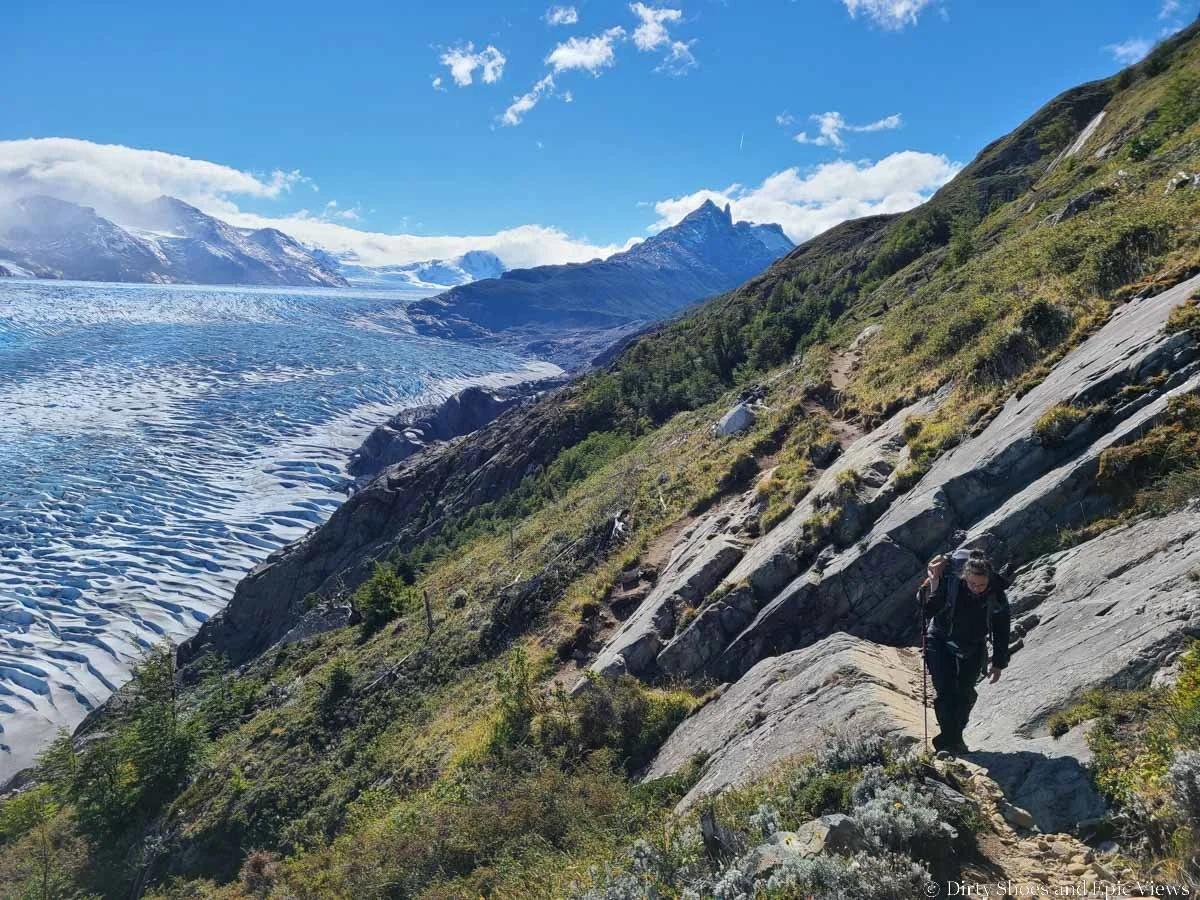
Other highlights of the O Circuit include the walk alongside the Grey Glacier on the western side of the O Circuit using a series of scenic suspension bridges and exposed terrain that give way to more gorgeous glacier views, hiking into the French Valley to see the French Glacier and up-close views of the famous Horns, and of course, hiking to the base of the famous Torres del Paine peaks- a perfect finale to the O Circuit!

One of three scenic suspension bridges on the western side of the O Circuit in Torres del Paine

The French Valley- a highlight of the O Circuit

The epic Torres del Paine along the O Circuit
The O Circuit is named for the shape it makes as it circles around the Torres del Paine mountain range. It’s not to be confused with another, perhaps more popular, trek in the park- the W Trek.
Also named for the shape the trail makes, the W Trek is an abbreviated version of the O Circuit, making up the southern portion of the O Trek and hitting a lot of the highlights of Torres del Paine National Park and the O Circuit itself but in a much shorter distance- viewpoints of the Grey Glacier, hiking into the French Valley, and hiking to the Torres del Paine viewpoint.
Given that the two treks share a lot of the same highlights, you might be wondering- should I hike the O Circuit or the W Trek? Let’s get into that now…
The O Trek vs. the W Trek in Torres del Paine

The W Trek and O Circuit share a lot of the same highlights in Torres del Paine- like this view of the French Glacier!
While the O Trek circumnavigates the entire Cordillera del Paine massif, the W Trek makes up just the southern and western portion of the O Trek, so it’s a much shorter hike.
The O Trek is nearly 114 km (or about 71 miles) and typically takes about 7-9 days to complete, while the W trek is about 64 km (or 40 miles) and typically takes 4-5 days to complete.
The W trek is much shorter and still hits a lot of the same highlights as the O Circuit, but there are still several reasons why we would recommend the O Circuit over the W Trek if you can swing it.
First, the O Circuit includes the hike over John Gardner Pass, which is an incredible highlight of the entire trek. As we’ll talk about below, this part of the trail is one-way only, so it can only be hiked on the O Circuit and is not accessible from the W Trek at all. Getting your first glimpse of Glacier Grey and the huge icefield as you crest over John Gardner Pass is, in our opinion, totally worth all the extra effort (both physically and in planning) for the O Circuit.

Views on the way up to John Gardner Pass- some of our favorite views on the entire O Circuit!
Second, by hiking the O Circuit, you get to experience the quieter and more remote backside of the Cordillera del Paine massif. A lot less people hike the O Circuit and there are no day hikers out here, so it’s a really nice backpacking experience and you get to see scenery that a lot of visitors to the park don’t get to see. When the O Circuit joined up with the W Trek after the John Gardner Pass, we definitely noticed a difference along the trail and particularly at camps- more crowds, less solitude, less quiet.

Views along the backside of the Cordillera del Paine massif that most people don’t get to see!
Third, because of the limited slots for the O Circuit and the fact that there are fewer people, one thing that I really came to love about the O Circuit was the sense of camaraderie that we built with all our fellow hikers. The O Trek can only be hiked in one direction, so you all kind of hike as a cohort, hopping from one campsite to the next, with a sort of “we’re all in this together” mentality. You’ll all hike individually at your own paces, but meet up with the same people each night at the campsite to share dinner and stories with hikers from all over the world. Once we had met up with the W Trek, I was a bit sad that all us O Trekkers kind of got diluted in with the W Trek crowds and we had sort of lost that bit of togetherness.
Finally, we really just loved the feeling of accomplishment at the end of the O Circuit! Of course, completing the W Trek is a worthy accomplishment itself, but knowing we were able to complete 8 days on the trail (our longest backpacking experience to date!) and survive the huge day of ascending and descending John Gardner Pass just really made us feel like we could take on anything!
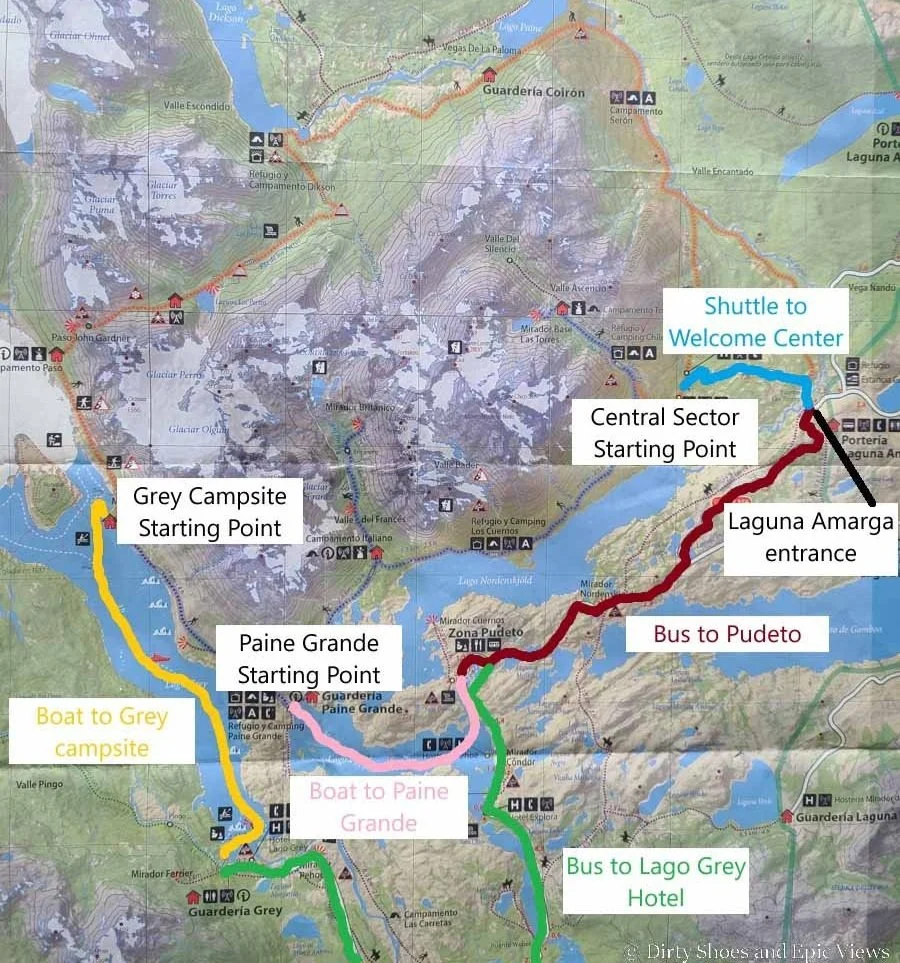
Map of the O Circuit and W Trek in Torres del Paine
To give you a better idea of what the O Circuit and W Trek in Torres del Paine look like, this map shows both hikes.

The O Circuit encompasses both the red and orange tracks and wraps around the entire massif (while the W Trek is just the orange track around the front of the massif). Map adapted from the park brochure.
The O Circuit, in red, wraps around the entire massif. It meets up with the W Trek (orange) on the western edge of the massif.
Both the W Trek and O Circuit then continue to follow the front side of the massif, visiting the French Valley (and Mirador Britanico) and the Torres del Paine along the way.
How Long is the O Circuit in Torres del Paine?
Here are our hiking stats for the complete O Circuit in Torres del Paine. We’ll break it down by day when we go over our O Circuit itinerary below.
Distance: 114 km / 71 miles
Total elevation gain: 4,613 meters / 15,135 ft
Time: 8 days
Elevation profile:
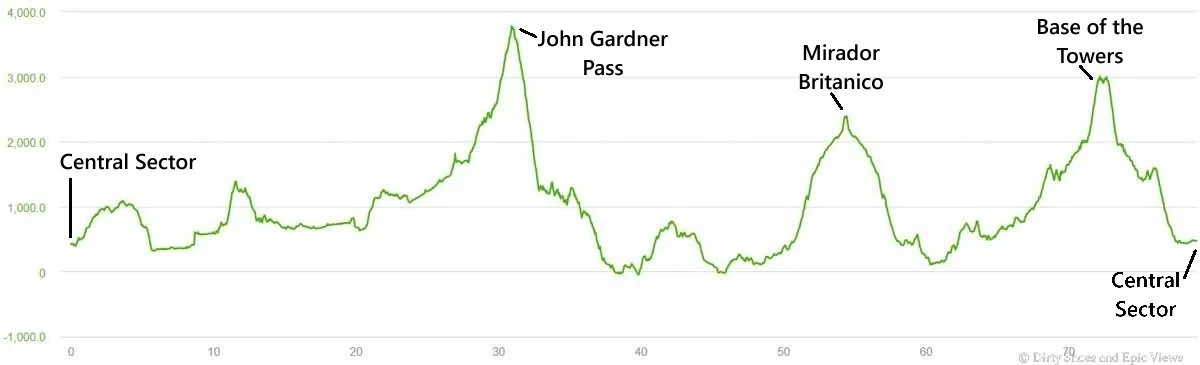
Our elevation profile of the O Circuit, starting and ending at the Central Sector
How many days does it take to hike the O Circuit in Torres del Paine?
Typically, it takes about 7-9 days to hike the O Circuit- it took us 8 days which is pretty standard. The campsites and refuges along the trail are laid out in a way that doesn’t allow for too much variation in itineraries, though there are a couple of ways to reduce it by a day if you’re a really strong backpacker or to add on a day if needed. The availability of campsites at the time you’re trying to book is really the biggest determinant of how many days you’ll be on the O Circuit.
How Hard is the O Circuit in Torres del Paine?
You’ll be happy to know that there’s nothing really technical or overly challenging about the O Circuit hike itself, and there’s not altitude to deal with either (the highest point of the trail is on the John Gardner Pass at 3,900 feet / 1200 m). The trails are mostly well-maintained (with the exception of a few dilapidated foot bridges), though they can have sections that get a bit steep and/or pretty rugged with lots of rocks and roots (things that can become infinitely harder to navigate with a heavy backpack!).

There are lots of small stream crossings- some with precarious foot bridges!
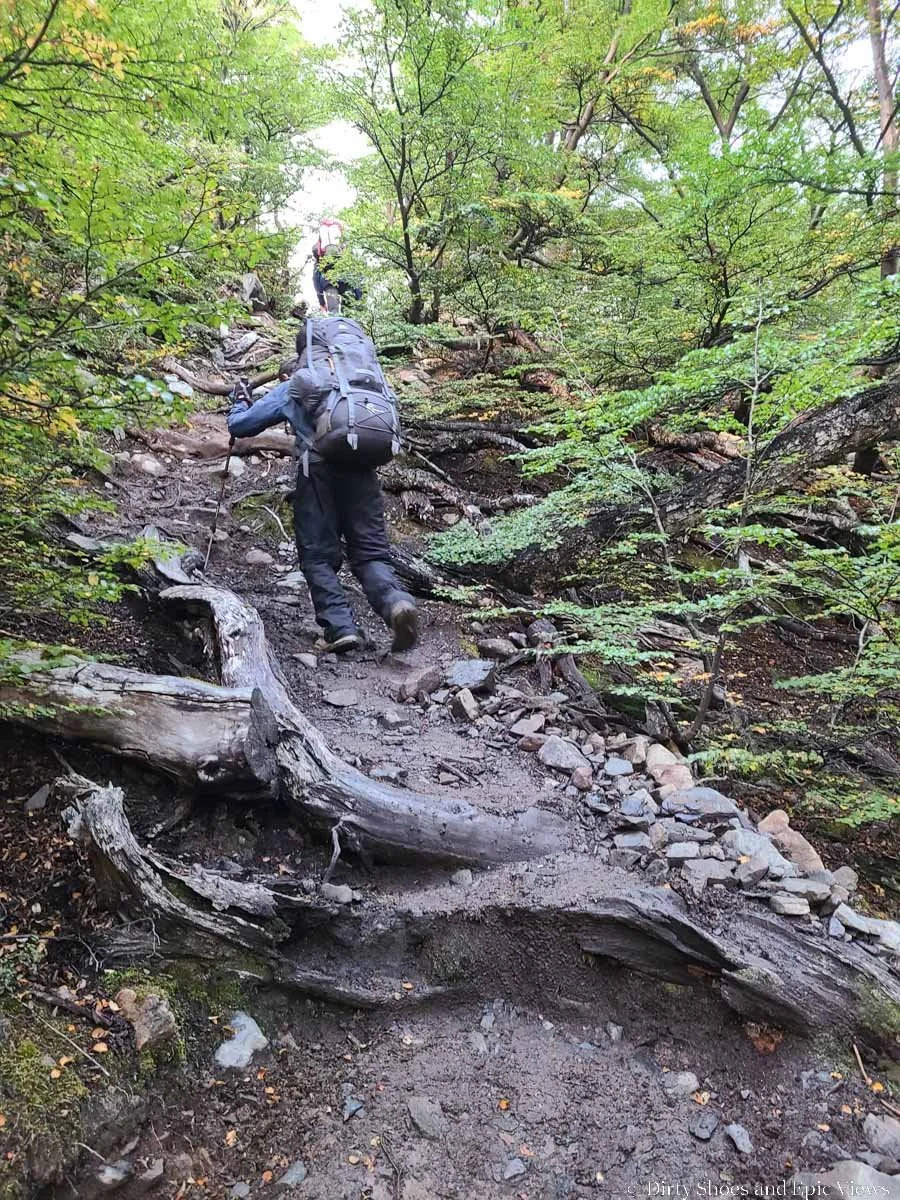
There are lots of sections of trail on the O Circuit that can get steep and rugged
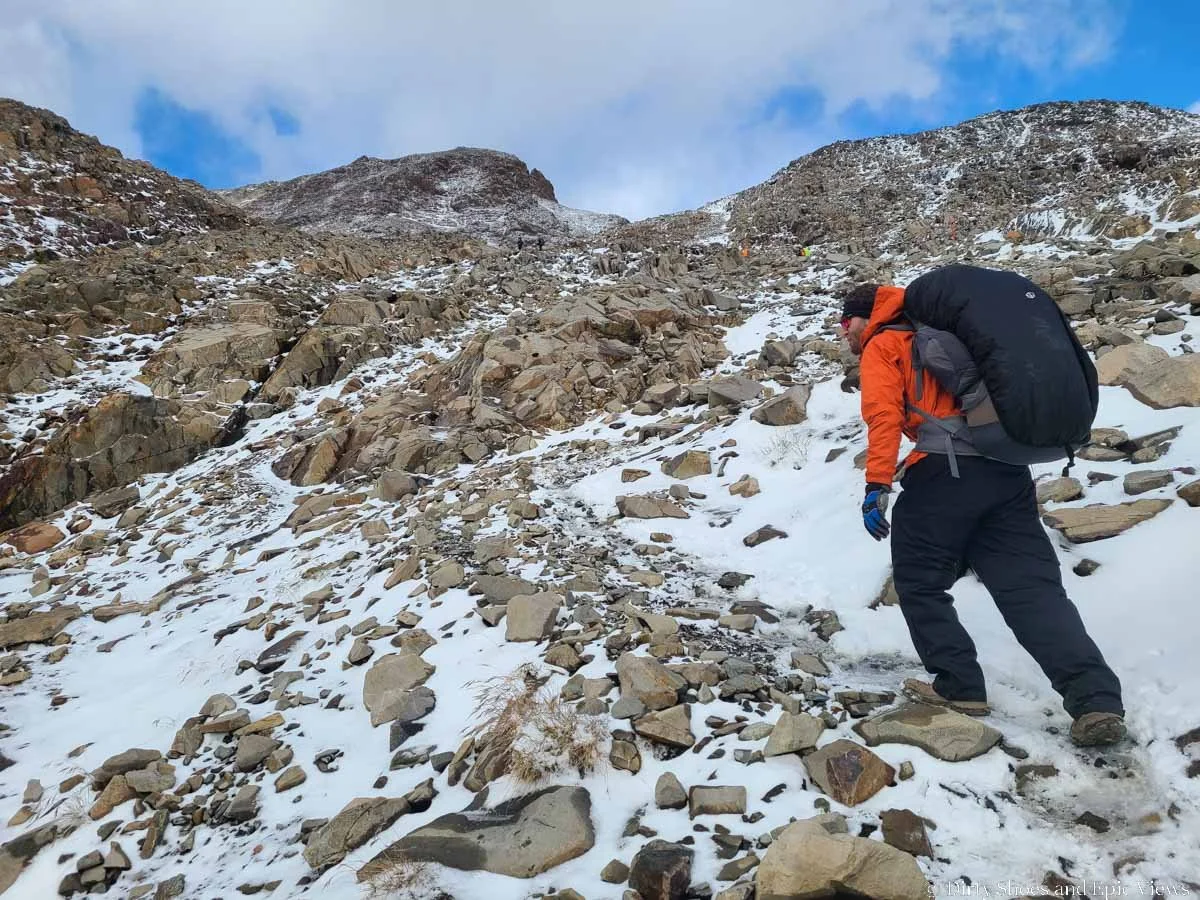
Terrain can also become quite rocky, particularly on the climb up to John Gardner Pass, the French Valley, and up to the base of the Towers. We also experienced snow on the trail on the higher elevations around John Gardner Pass!
There are times where the trail narrows and traverses the slopes alongside valleys, but we were never phased by this and didn’t find there to be any scary exposure.
There are some more “exposed” sections of trail but nothing that was ever too scary or unsafe
The one challenge that may be hard for people with a fear of heights are the series of three suspension bridges found along the western end of the O Circuit, between John Gardner Pass and the Grey Refuge and Campsite. These three wobbly bridges are quite long and span across some fairly deep ravines. I was definitely nervous (and took a comical amount of time to cross) but I just took it one step at a time.
While the bridges don’t specify just a one person capacity, I’d definitely recommend letting just one person go at a time. If you’re nervous and someone is behind you waiting, let them know to wait until you’re fully crossed before stepping out onto the bridge. And if someone is already out on the bridge when you get to it, just wait a few minutes and let them safely cross. Nothing is worse than being super nervous on a suspension bridge and then feeling the wobble of someone clamoring up behind you! (Thank you in advance.)

The suspension bridges on the O Circuit
Other than that, the only real thing that makes the O Circuit difficult is the sheer distance. Seventy miles with a heavy backpack on is no easy feat. And across those 70 miles, be prepared for lots (and lots) of ups and downs each day. Individually, most of them might not seem like much, but believe me- they start adding up. As you can see from our stats above, we climbed over 15,000 feet in elevation across those 8 days!
So just coming with the physical and mental fortitude to handle the distance and long days on the trail is half the battle.

Expect lots of ups and downs and long climbs with a heavy pack on the O Circuit
Oh, and one other thing that’s pretty important and that can make or break your O Circuit hike: the weather.
Mountain weather is notorious for having a mind of its own, being unpredictable, and changing often, and Patagonia and Torres del Paine are no different. I will warn you right now: You will NOT have 8 perfect days on the trail…so pack accordingly!
Across our 8 days on the O Trek, we experienced sun, warmth, rain, snow, freezing temperatures, and everything in between.

Trying to enjoy the views of the Los Perros Glacier, but in reality- it was freezing, super windy, and even snowing on us here!

Rain, wind, and clouds coming through the valley on the way up to the Torres del Paine viewpoint

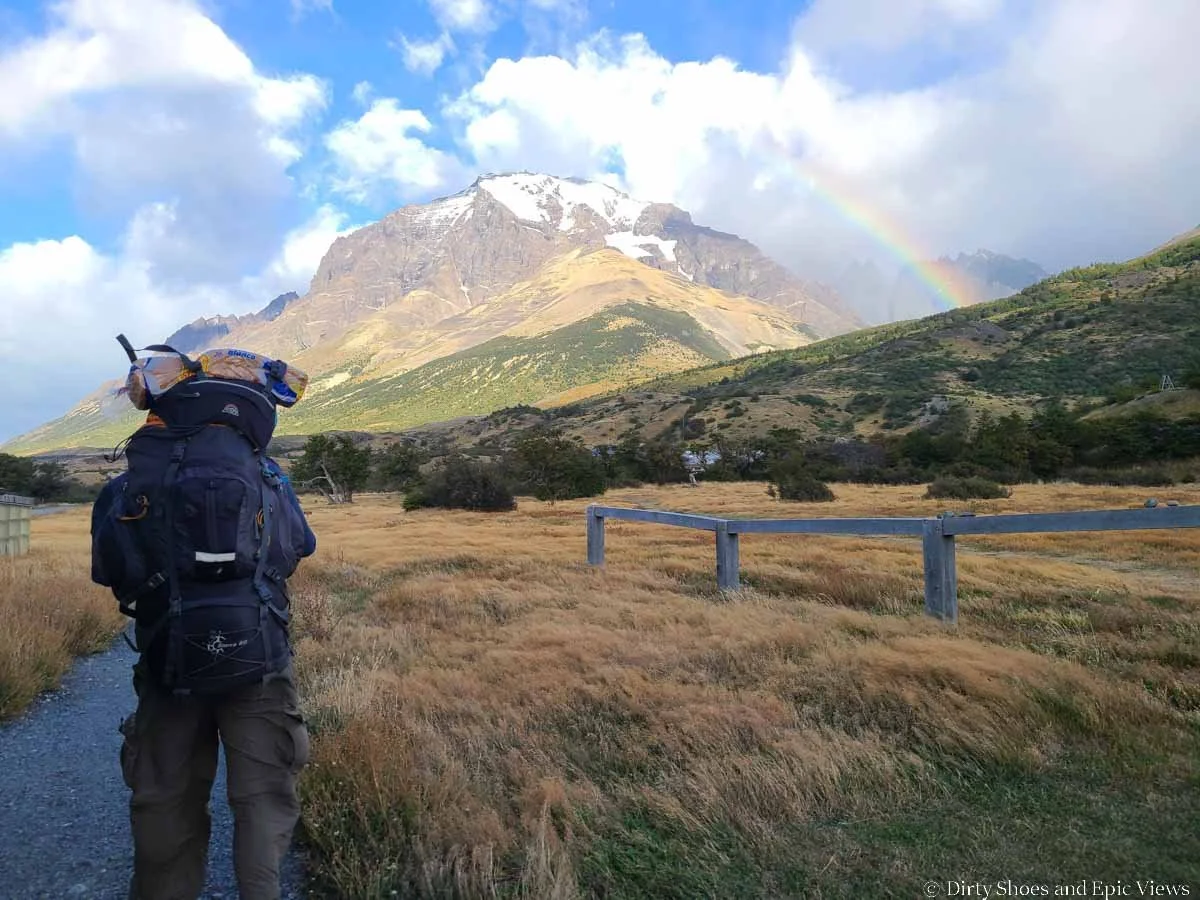
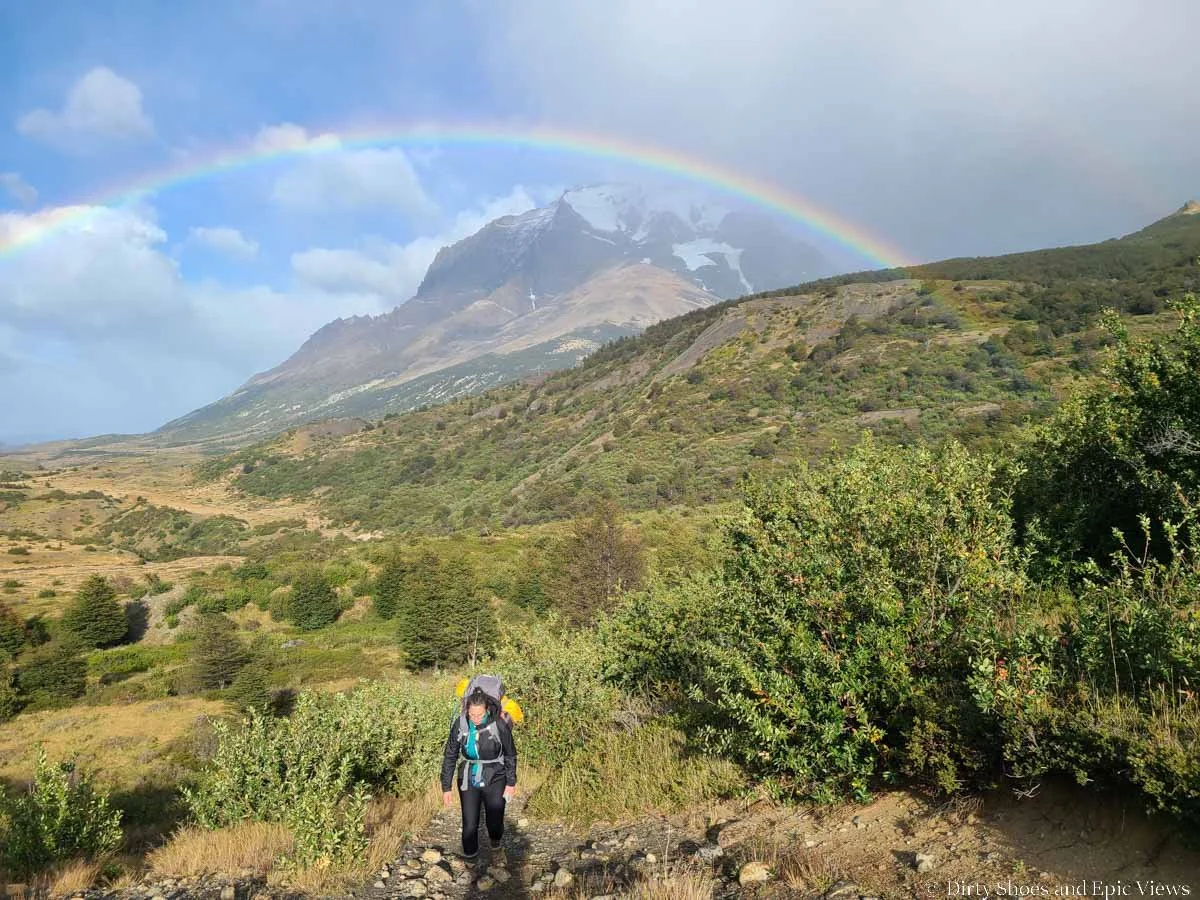
Rain plus rainbows along the O Circuit!
Oh, and wind- yes the famous Patagonia wind. Torres del Paine is known for its strong and gusty winds, particularly in the summer. Sometimes, the gusts can be as strong as 60 or 70 mph! And we experienced that strong wind on multiple places on the O Trek.
At some points, the wind was so strong it was quite difficult to walk forward, sand would be whipping into our faces, and one time Kevin’s pack cover flew right off his pack and we had a good time chasing it down. Be sure all your gear is secured properly onto your pack, and something that would be really helpful to have is some sort of buff or bandanna that you can cover your face with- it will protect your face from whipping dirt and gravel and help you breathe better through the headwinds.
Being mentally prepared (and prepared with the right gear!) for experiencing any and all kind of weather for 8 days on the O Circuit is key!
Do You Need A Permit to Hike the O Trek?

While you don’t need a permit to hike the O Circuit itself, there are a few things you want to make sure you have before entering the park or trying to hike!
Campsite/refuge reservations: You have to have all of your accommodations for the O Circuit pre-booked. These get snatched up months in advance, so it’s important to start planning for the O Circuit early! Once you reach each campsite and refuge, you have to check in and they will make sure you have a reservation. Be sure to either print out or download to your phone each of your reservations to show each day. We’ll go over how to get O Circuit accommodations below.
Torres del Paine entrance ticket: Before you get to the park, you need to purchase your Torres del Paine entry ticket online. You can either print it out or download the ticket to your phone to show them at the park entrance.
Head to this site to buy your Torres del Paine ticket. There are options for Chilean citizens or tourists and you can select a ticket that is good for up to three days or for over three days. For the O Circuit, you’ll need to buy the latter, which comes out to just about $50 USD per person (it’s quite an expensive park!).
Do You Need A Guide to Hike the O Circuit in Torres del Paine?
You definitely don’t need a guide for the O Trek! The trails are well-maintained and easy to follow, and there will always be people on the trail with you. And if you really don’t want to bother with carrying too much weight, you can always pay more to stay in the refuges and pay for meals so that you don’t have to carry much gear or food. We don’t think a guide is necessary, and it can run you in the thousands.
This guide is geared toward people who are planning the trek on their own, but if having a guide is something you are still interested in just to feel more comfortable, or maybe to learn more about the environment, or just to have someone deal with all the logistics for you so that all you have to do is show up and hike, check out this site to get ideas on the types of O Circuit guided tours offered and how much they cost.
The Best Time to Hike the O Circuit in Torres del Paine
It’s important to know that the O Trek is not open year-round- for good (safety) reasons. Typically, it opens November 1st and closes March 31st, but this can depend on the weather and conditions, and can close unexpectedly towards the end of the season if conditions are bad.
Because of this, the best time to hike the O Circuit is between December and February, which are the prime summer months in Torres del Paine. You’ll have the warmest days and the best shot at good trail conditions, but there will be a lot of crowds (something that really is hard to avoid in such a famous and stunningly beautiful place!).
If you go in the shoulder months of November and March, just be prepared for more variable trail conditions, such as lingering snow. We hiked the O Circuit in mid-March. The mountains had started experiencing snowfall for the season, and there was some patchy snow on John Gardner Pass- luckily not enough to close the trail just yet. But keep in mind that if snow begins early, the park can close either the whole circuit early, or may close the pass due to poor and unsafe conditions, which essentially will prevent you from completing the trek.
Snow near John Gardner Pass in mid-March on the O Circuit
No matter when you go, be prepared for all the elements- rain, wind, snow, and sun. We experienced it all on the O Trek in mid-March, but rain and strong winds can happen at any time and often unpredictably.
It can be helpful to check the weather in the few days before you tackle the O Circuit. We like using the YR site and also the Torres del Paine website.
But even so, weather can’t reliably be predicted too far in advance (we often saw forecasts such as this).
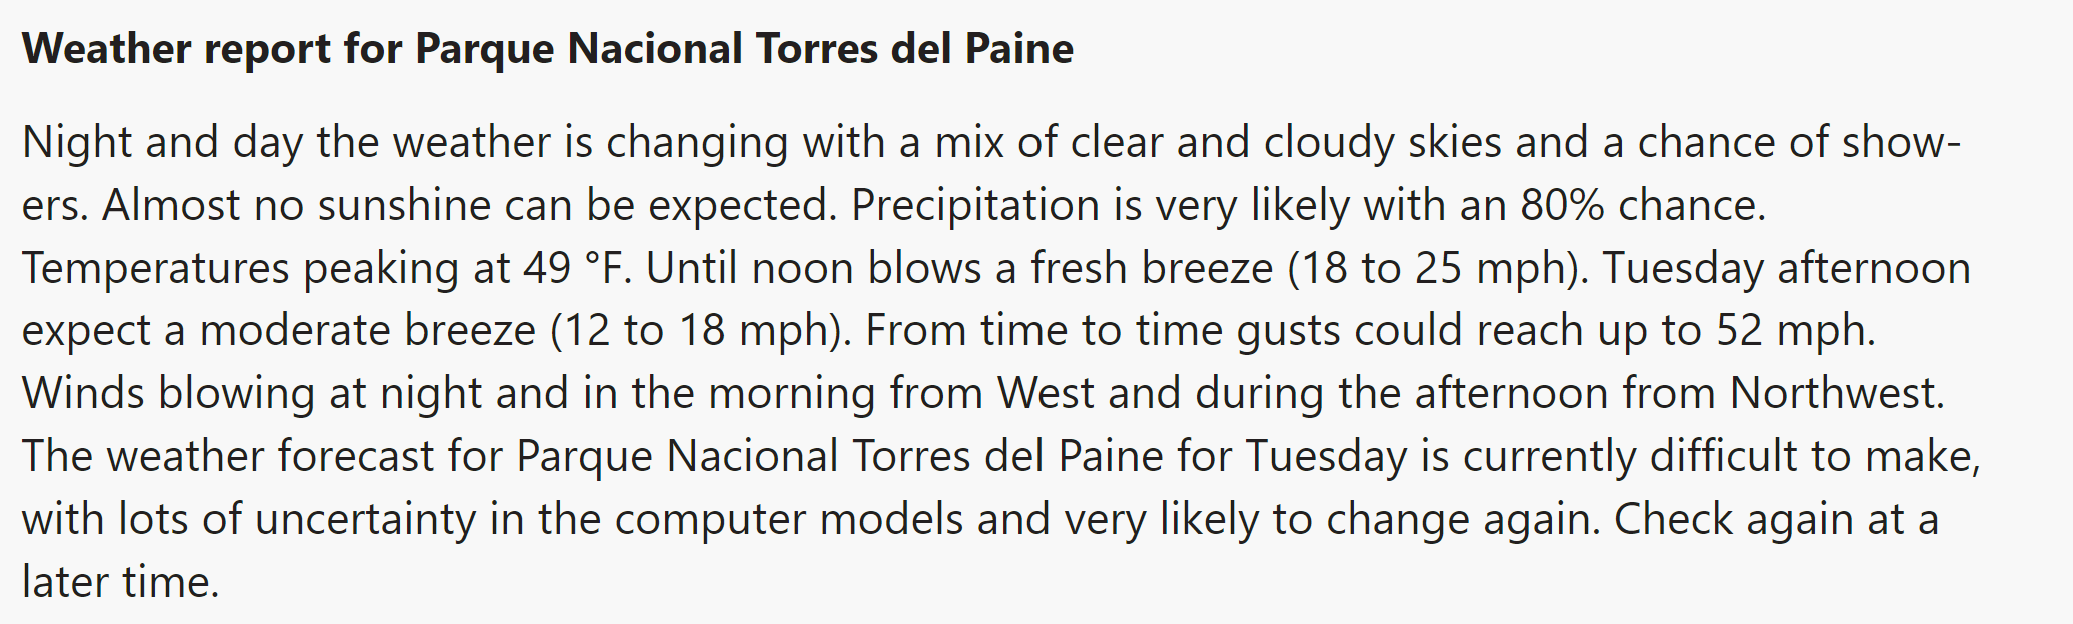
So in the end, expect anything.
Where Does the O Circuit Start?
Once you’re in Torres del Paine National Park, where does the O Circuit start?
Well, there are a few options for where you can start the O Trek, but we recommend one of them most.
But before we go over that, the first thing we need to note is that the O Circuit is a one-way trail. You can only hike the O Circuit in a counterclockwise direction around the massif (this is important to know for booking campsites and for deciding where you’ll start, since you can’t backtrack!).
With that in mind, here are the main starting points for the O Circuit in Torres del Paine:
Las Torres area
The O Circuit trailhead at Las Torres Welcome Center
Las Torres area is where the Torres Central Refuge and Campground are located. From here, the first campsite you would hike to would be Seron, and then you would end your trek with a hike to the base of the Torres del Paine.
Las Torres area is where we would recommend starting the O Circuit. If you start here, you’ll end your hike at the base of the Torres del Paine, which is an epic grand finale to your backpacking trek, and the reward of seeing the Torres will feel that much sweeter. Basically, starting here will save the best for last.
By starting at Las Torres area, you’ll also have one or two easier days on the trail to get your legs warmed up (and it lets you have some easy days while your pack is at its heaviest with food).
You’ll hike up the John Gardner Pass (the hardest day on the hike) about midway through the O Circuit, when your legs will be warmed up for the long and exhausting day, but not burnt out from the full 8 or 9 days of hiking.
Another pro to starting here is that you won’t have to have an additional ferry cost to get you to the start of the trek like you would at the other starting points.
Most people start at Las Torres, so you’ll likely be with the same cohort of people for the start and end of the O Trek, which is nice- you can all celebrate your accomplishment together at the end!
Paine Grande Campsite and Refuge
Another option to start the O Circuit is at the Paine Grande Campsite and Refuge. To get to this starting point, you’ll need to take a 30 minute ferry ride across Lake Pehoe.

In the distance, you can see the Paine Grande lodge and campsite sitting on the shore of Lake Pehoe- another starting point for the O Circuit
By starting here, you’ll hike to the base of the Torres on your second day, and save the pass for the second to last day. At this point, your legs might be feeling it a bit and the pass will be that much harder to climb, but saving the epic views of Glacier Grey for the last two days of the trek would be a great grand finale to the hike as well.
Grey Campsite and Refuge
While you can also start the O Circuit at the Grey Campsite and Refuge, this is not very common. You’d likely get to the starting point later in the day and have to spend the night here before starting on the trail, and your last day would be going up and over the pass. It also requires quite an expensive boat ride to get to this starting point.
We’d recommend starting here only if campground logistics force you to start here.
While we recommend starting the O Circuit from Las Torres region, it really all depends on how you are able to book your campsites. For the dates you are looking at, it may be that logistically, it’s only possible to find the correct series of available campsites and lodging by starting at one point and not another. For that reason, it’s good to know that there are several options for where you can start the O Trek!
So, how do you get to each of these O Circuit starting points? Let’s get into those logistics now!
How to Get to Torres del Paine in Chile
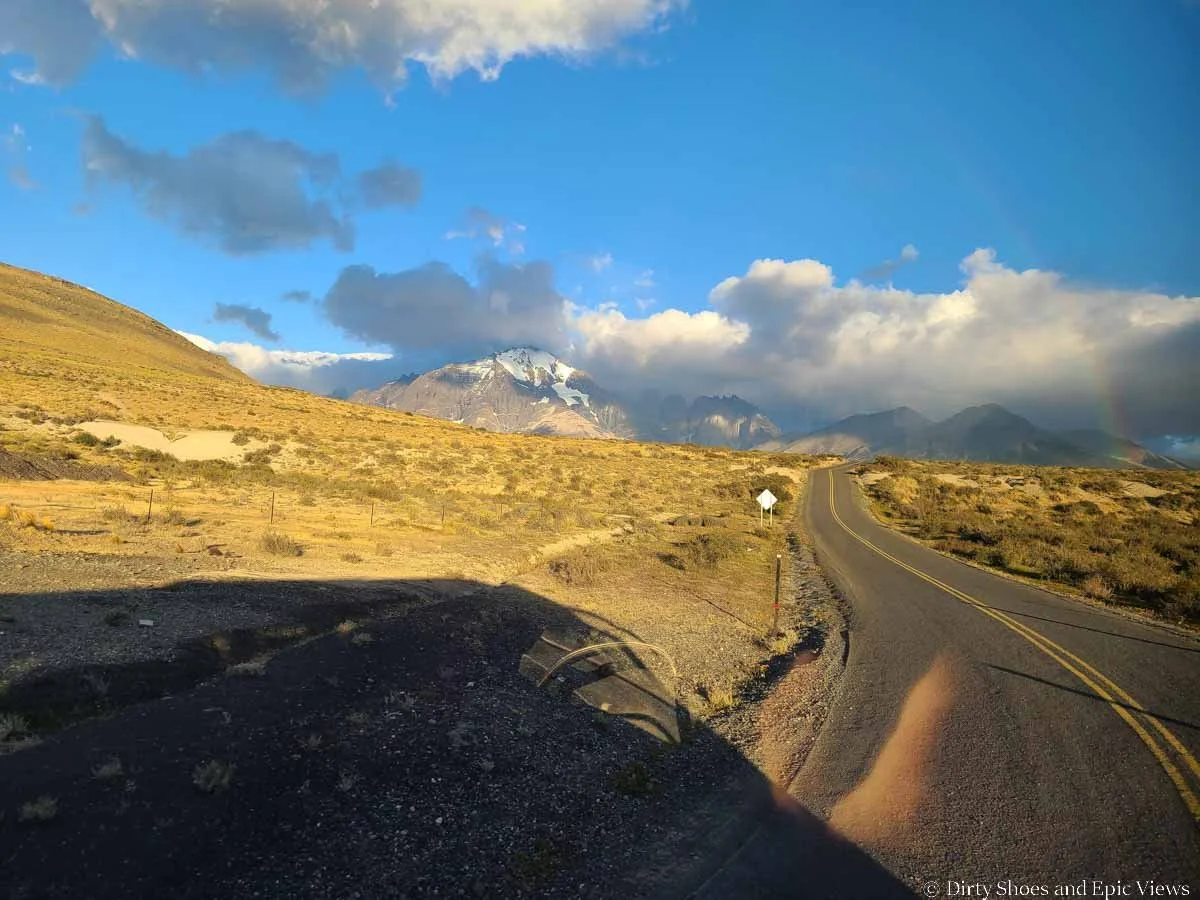
The road to Torres del Paine!
Getting to the O Circuit and Torres del Paine National Park is a multistep process that requires a bit of planning. The typical way to get to Torres del Paine includes:
Travel to Punta Arenas, Chile
Travel from Punta Arenas to Puerto Natales
Travel from Puerto Natales to Torres del Paine
Getting to Punta Arenas
The most common way to reach Torres del Paine National Park is to fly into Punta Arenas, Chile by flying into Presidente Carlos Ibáñez del Campo International Airport (PUQ).
Once here, it’s common for people, especially those doing the O Circuit, to get around by bus rather than by renting their own car. While it might be a tad bit more convenient to have your own car (and renting a car is usually the option we’d opt for), it would be a pretty big waste to have the car sit in a parking lot for 8 or so days while you complete the O Trek.
For us, it made sense to get around this region of Patagonia by bus. The bus network between all the relevant towns in this region of Patagonia is pretty good. Tickets are easy to book online or at the bus stations in town and they are pretty cheap. Buses also run frequently, so it worked well for us.
Punta Arenas to Puerto Natales
From Punta Arenas, you’ll want to head to the gateway town of Torres del Paine- Puerto Natales. The bus ride between these two towns is about 3 hours and 15 minutes.

Puerto Natales sits in front of Patagonian mountain views
Bus Sur and Bus Fernandez are two major bus companies that run this route. A one-way ticket costs about 8,000 CLP, or less than $9 USD- so very affordable!
In the high season, we recommend buying a bus ticket a few days in advance either online on their websites or at their bus station in town, just to be sure you can get a seat for the specific time you want. However, there are lots of options, as buses run from Punta Arenas about every hour or two, so you shouldn’t have an issue getting a seat on at least one of the buses on the day you want.
The bus ride between Punta Arenas and Puerto Natales was pretty uneventful as it travels through a lot of countryside, but be sure to keep your eyes peeled for gaunacos and rhea which we saw from time to time! As you get closer to Puerto Natales, the distant mountains of Patagonia start coming into view, too!
Once you’re in Puerto Natales, we recommend spending a day or two here to prep for the O Circuit- get any last-minute gear you need, purchase all your food, and pack for the trek. There is one central bus station in Puerto Natales that all the bus companies use, so we recommend booking a stay at a place within walking distance of this station just to make it easier on yourself.

Take a day or two in Puerto Natales to get ready for the O Trek and explore the town and its views
Coming from Argentina?
Many people who are exploring Patagonia visit both the Argentinian and Chilean sides. Argentina has its own hiking gems, particularly in El Chalten (be sure to check out our guide to El Chalten and our trail guide to our favorite hike there- the Laguna de Los Tres hike!).
If you’re visiting El Chalten, you’ll likely fly into El Calafate first and travel to El Chalten from there. After your time in El Chalten, you can head back to El Calafate and take a bus all the way to Puerto Natales. This will take about 6 hours (including a stop for border control), and several companies makes this trip, such as Bus Sur, Cootra, and Turismo Zaahj. I would take a look at the Bus Bud website to see the schedules of the different companies that run this route.
Puerto Natales to Torres del Paine
From Puerto Natales, you’ll take another bus to Torres del Paine National Park, which is about a 1.5 to 2 hour ride (to the entrance- a bit longer if you are taking the bus deeper into the park).
There is a central bus station in Puerto Natales that houses a lot of bus companies that seem to run this route, including Bus Sur, Bus Pacheco, Turiismo Zaahj, Bus Maria Jose, and Bus Cootra, however Bus Sur is the one that seems to be the easiest to find and book tickets online. However, you can simply show up to the station in town and buy tickets for any of the buses, too.
Whether you buy a ticket online or in person, we definitely recommend buying a ticket a few days in advance. There are limited buses that run each day, and if you want to get an early start on the trail, you’ll need to snag a morning spot.
Bus Sur, for example, has five daily buses from Puerto Natales to Torres del Paine. There are a couple of early morning buses (6:45 am and 7 am), a midday noon bus, a midafternoon bus at 2:30 pm and an evening bus at 6 pm.
If you want to get a day of hiking under your belt on your first day in the park, we definitely recommend getting one of the two early morning buses. We took the first 6:45 am bus so that we could get on the trail as early as possible. Our first day hiking to Seron wasn’t too long or hard, but we just wanted to make sure everything went smoothly for our first day.
The bus will cost about 14,000 CLP, or $15 USD to the park entrance (and slightly more- 25,000 CLP/$27 USD- to go all the way to the Grey Lake Hotel).
The bus to Torres del Paine is about an hour and half or so, mostly through countryside again but as before, watch for guancaos! It’s cool to watch the mountains of Torres del Paine come into view as you get closer and closer to the park- it definitely gets you excited for the trek ahead!

Views from the bus to Torres del Paine
Getting to the O Circuit trailhead
The bus to Torres del Paine makes multiple stops in the park, so make sure you buy the appropriate ticket depending on where you will be starting the O Trek.
If you are starting the O Circuit at Las Torres region, buy a ticket from Puerto Natales to Laguna Amarga (the park entrance).
If starting at Paine Grande, buy a ticket from Puerto Natales to Pudeto. This is where you’ll catch a boat to Paine Grande.
If starting at Grey Campsite and Refuge, buy a ticket from Puerto Natales to the Grey Lake Hotel, which is where you’ll catch a boat to the Grey Campsite.
Once you reach Torres del Paine, the bus will first stop at the Laguna Amarga entrance. Regardless of your final destination in the park, everyone is required to get off here to check into the park.
A lot of buses end up arriving here at the same time, so it can feel a bit crowded. When we arrived with the first buses of the day, the line was already long but it actually moved pretty quickly and we were on our way in about 15 minutes.

Checking in at Laguna Amarga
At check-in, you will be asked to show your pre- purchased Torres del Paine park ticket. They might ask for other things, like what your plans are, your passport, and your reservation confirmations. However, they only asked us for our entry passes and what our plans were, and then they gave us a map and sent us on our way.
Your next steps will depend on where you are starting the O Circuit…
Starting at Las Torres region
If you are starting the O Circuit at Las Torres region, don’t get back on the bus. Instead, there will be a shuttle waiting here to take people up to the Welcome Center at Las Torres region.
This shuttle has an additional fee and is booked separately from the bus you took to get here. We purchased with cash in person, but it can also be booked online. It costs 4,000 CLP or $5 USD.
When we were there, there were lots of people who needed this shuttle, and it filled up fast, so they brought in another van to fit everyone else- so it doesn’t seem like you have to worry too much about not getting a seat. They seem well prepared to transfer everyone from each of the busloads that come in.

The view of Torres del Paine National Park from the Laguna Amarga entrance. The two buses that arrived from Puerto Natales are parked on the right, and the shuttle to the Welcome Center is the bus in the center labeled “Las Torres”.
The shuttle will bring you to the Welcome Center in Las Torres region, about ten minutes away. If you wanted to skip the shuttle, you can hike a 7 km trail from Laguna Amarga to the Welcome Center. We don’t have any experience with this, but still wouldn’t recommend it! The shuttle saves you lots of time and energy that could be well spent on the actual O Circuit. The extra few bucks is worth it in our opinion.
At the Welcome Center, we were required to check into the O Circuit and had to show our reservation number for our first campsite on the trail, and then we could simply start the trek from here!
An important note about returning after you finish the O Circuit:
When you get back to the Welcome Center at the end of the trek, you’ll need to get the shuttle back to the Laguna Amarga entrance, and then a bus back to Puerto Natales. The shuttles leaving the welcome center are timed well to connect to the bus departures (when you get to the park, just ask for the shuttle schedules to double check when they leave the Welcome Center every day). For Bus Sur, there are three daily buses that leave from Torres del Paine and go back to Puerto Natales. When you’re looking at the bus schedule, make sure you are looking at the times for Laguna Amarga pick-up (and not any of the other stops in the park)! The buses leave Laguna Amarga at 11 am, 3 pm, and 8 pm (be sure to check their website for the most updated times and schedules). We recommend choosing the latest time you can. While 8 pm seems late, we were so happy we chose that ticket.
The reason? Well, our last day on the O Circuit (when we hiked to the base of the Torres del Paine) had super bad weather, and the Torres didn’t actually show themselves until midday. Most of our fellow O trekkers who we had met on the trail had booked the mid-afternoon bus tickets, and they actually had to start hiking back down before the Torres ever came out- a major bummer!
Because we had a late bus ticket, we were able to wait it out for most of the day. We were determined to see those dang Torres after 8 days on the trail! And our persistence paid off once the weather finally cleared. Then we could take our time and hike back down to catch the later bus. Having that later ticket really just allowed us more flexibility and a less rushed last day on the trail.
Starting at Paine Grande
After you check in at Laguna Amarga, hop back on the same bus and continue to the next stop at Pudeto. Here, you’ll catch a catamaran, which leaves daily in the summer at 8:30 am, 10:30 am, 4:15 pm and 6 pm (so you’ll definitely need to take one of the early morning buses from Puerto Natales to get the 10:30 am ferry) and crosses Lake Pehoe to get to Paine Grande Refuge and Campsite that sits right on the shore of the lake along the O Trek. The boat journey takes about a half hour. From here, you can start your trek.
This boat ride on Lake Pehoe needs to be booked in advance here. Each one- way trip costs 27,000 CLP/29 USD.
Make sure to also book your trip back- the boat leaves daily from Paine Grande in the summer at 9 am, 11:20 am, 5 pm, and 6:40 pm. We recommend booking one of the two latest ferries to give you enough time on the trail on your last day of the O Circuit.
Starting at Grey Campsite and Refuge
After checking in at Laguna Amarga, hop back on the bus and take it to Lake Grey Hotel where you’ll take a boat (the Grey III) to the Grey Lake Campsite and Refuge.
This boat also needs to be booked in advance here. It’s more of a tourist boat that takes people on a scenic cruise to see the base of Grey Glacier, so it’s a longer ride and quite a bit more expensive- one way to camp is 100,000 CLP or $107 USD.
Once you hop off the bus at the hotel, check in for the boat at hotel and from there, it’s a 30-45 minute walk along the lake shore to the boat pick up point. Boats leave daily at 10 am, 1 am, 4 pm, and 7 pm in the summer.
Depending on which boat you get, the ride to the campsite can be 45 to 90 minutes to the drop- off point near the Grey campsite. The 4 pm boat is the one that takes longer because it visits the Glacier before dropping people off as opposed to after dropping people off, so the pro to taking this boat is you can take full advantage of the glacier tour that this boat includes before hopping off. However, you’ll get to camp too late in the day to start your O Trek, and will have to wait until the morning to start. The other boats make the drop-off first, so it’s a lot of money to spend for a short boat ride and not get the full ticket’s worth.
You can also book the pricey one-way ticket back from Grey at the end of your trek. The boat leaves the site at 11 am, 2 pm, 5:45 pm, and 8 pm.
Overview of how to get to the O Circuit
A map of the different starting points for the O Circuit and how to get to each
Option 1: Fly to Punta Arenas à Bus to Puerto Natales à Bus to Torres del Paine (stop at Laguna Amarga entrance to check in) à Take the shuttle to Las Torres Welcome Center à Start the hike
Option 2: Fly to Punta Arenas à Bus to Puerto Natales à Bus to Torres del Paine (stop at Laguna Amarga entrance to check in) à Take the bus to the Pudeto stop à Take the catamaran to Paine Grandeà Start the hike
Option 3: Fly to Punta Arenas à Bus to Puerto Natales à Bus to Torres del Paine (stop at Laguna Amarga entrance to check in) à Take the bus to the Lake Grey Hotelà Walk 30-45 minutes to the boat launch à Take the boat to Grey Campsite à Start the hike
Accommodations on the O Circuit in Torres del Paine

Campsites and lodges are found throughout the O Circuit
Now to get to one of the most important pieces of the puzzle when it comes to hiking the O Circuit- accommodations on the trail!
Along the 70 miles of the O Trek are a series of accommodations in the form of both campsites (campamentos) and refuges (refugios) that allow you to break up the trek into reasonable distances each day.
There are two companies that operate the campsites and refuges on the O Circuit: Vertice Patagonia and Las Torres.
Each site along the O Circuit usually offers both a campground and a refuge option with different amenities, and the cost of the O Trek can vary drastically depending on which accommodation options you choose.
Staying at a refuge: The refuges (or hostels) on the O Circuit typically have dorm style beds in shared rooms, a restaurant or café that serves snacks, drinks, and/or warm meals, a camp shop, shared bathrooms, and hot showers.
Camping: If you choose to camp, you’ll get a place to pitch a tent, but you also have access to most of the refuge’s amenities, like bathrooms, hot showers (often only at specific times throughout the day or on timed use to preserve hot water for everyone), and the ability to buy snacks and food if you want.
Usually campsites also have a cooking shelter where you can cook any camp food that you packed in. It’s usually required to do any cooking in these shelters to protect stoves from the high Patagonia winds and prevent fires.
Pre-setup campsites: If you want to cut down on gear and weight in your pack, you can buy the option of having the tent and all sleeping gear set up for you when you arrive to camp.
Meals: For both campers and those staying in a refuge, you can purchase half or full board, which includes dinner and breakfast, or dinner, breakfast, and a packed lunch to go, respectively. If you don’t buy half or full board in advance, you can also buy food from their cafes and restaurants when you get there.
Having the option to rent gear and buy food at each site really allows you to pack light for the O Circuit and hike much faster and easier, but it does come at a very high cost.

Most campsites on the O Trek have markets where you can buy small snacks and food items
Some other things to note:
At each site, you’ll be required to check-in, show your reservations, and sometimes your passport and PDI tourist card, so make sure you have all of these things on hand.
There is no cell service in the park. Some of the bigger refuge areas do have WiFi (that is often a paid service)- but we highly recommend just disconnecting for your time out on the trails!
Most places have electrical sockets in common areas to charge your devices, but often they are being used by others, and they cut off electricity at night to save on resources. We recommend carrying a power bank with you to charge your devices on the fly when needed.
Below, we’ll briefly go over all the campgrounds and refuges, their amenities, and their costs. These are listed in the order you will find them on the O Circuit should you start at Las Torres region (keeping in mind you can only travel counter- clockwise along the O Circuit).
Current costs are in USD for each of the accommodation options (we recommend heading to the individual sites for the most up-to-date information and pricing). Typically, all accommodation types run by the same company have the same, or very similar, costs which makes things a bit easier.
Seron (campground only)
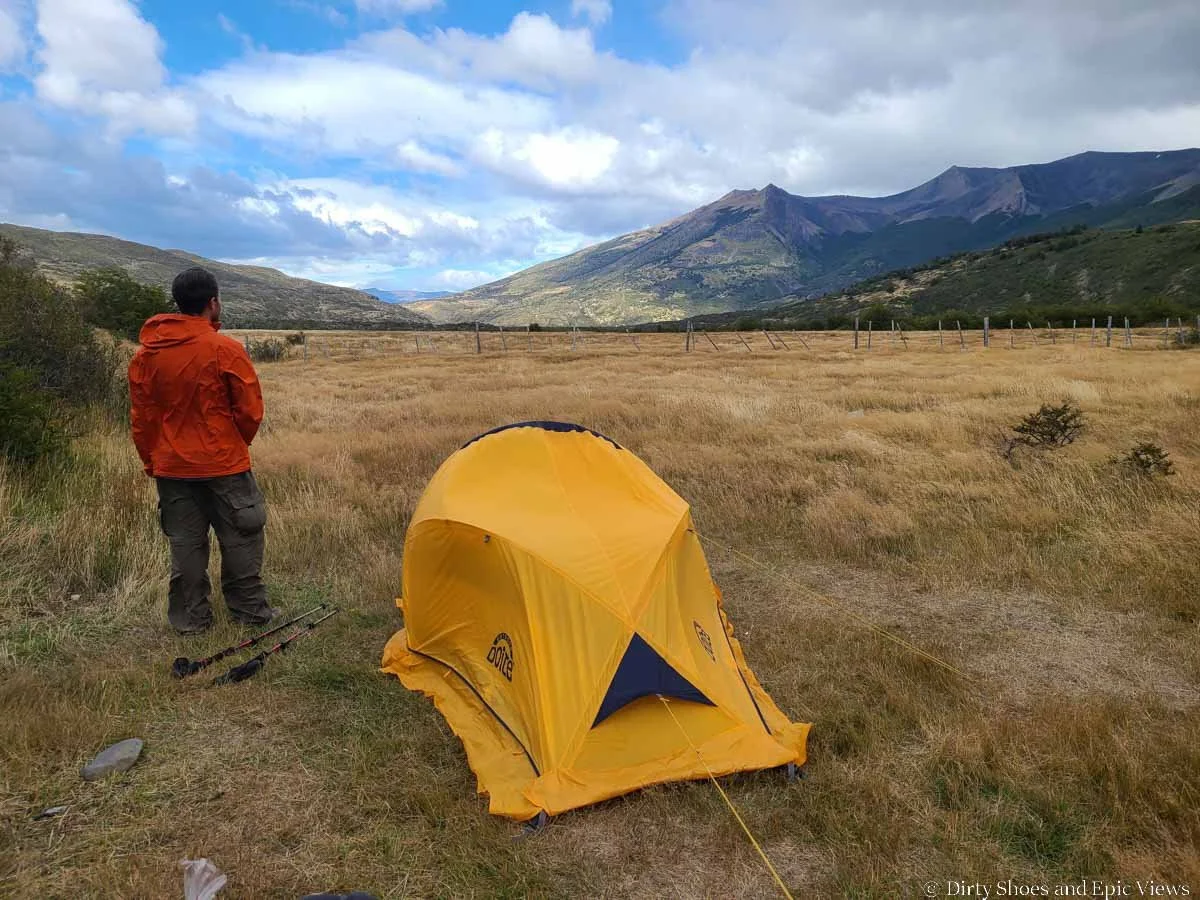
Our campsite at Seron for our first night on the O Circuit
Seron is often the first campground O trekkers hike to. It’s set in a nice meadow in a valley on the eastern side of the massif. There is an area for all the pre-set up tents, and a nice large field for setting up your own tent.
Amenities: Campground, dining room where you can purchase snacks and meals, shared bathrooms with hot showers, WiFi, cooking shelter, dish washing station

The field of tents at Seron Campground
Drinks and snacks are available at the Seron campground

Pre-setup tents on wooden platforms at Seron. The cooking shelter is the white tent on the left.
Current costs in USD for each of the accommodation options (we recommend heading to the Las Torres site for the most up-to-date information and pricing):
Camping options
Bare site to pitch your own tent: $40-50 per person, depending on the time of year- based on double occupancy. If solo, it’s $70-90. If you wanted to rent a basic 2 person tent for the site instead of carrying your own, it’s an additional $60-65 for a night.
Semi-equipped (simple) Premium Campsite (comes with an elevated tent and a sleeping mat): $105-110 per person for double occupancy, or $190-200 for single occupancy.
Fully equipped Premium Campsite (comes with elevated tent, sleeping bags, sleeping mats, pillows, and a drink): $140-150 per person for double occupancy, or $250-270 for single occupancy.
Meal options
Full board (dinner, breakfast the next morning, and a boxed lunch to take with you on the trail): $130
Half board (dinner, breakfast): $90
Breakfast: $35
Boxed lunch: $40
Dinner: $64
Dickson (campground and refuge)
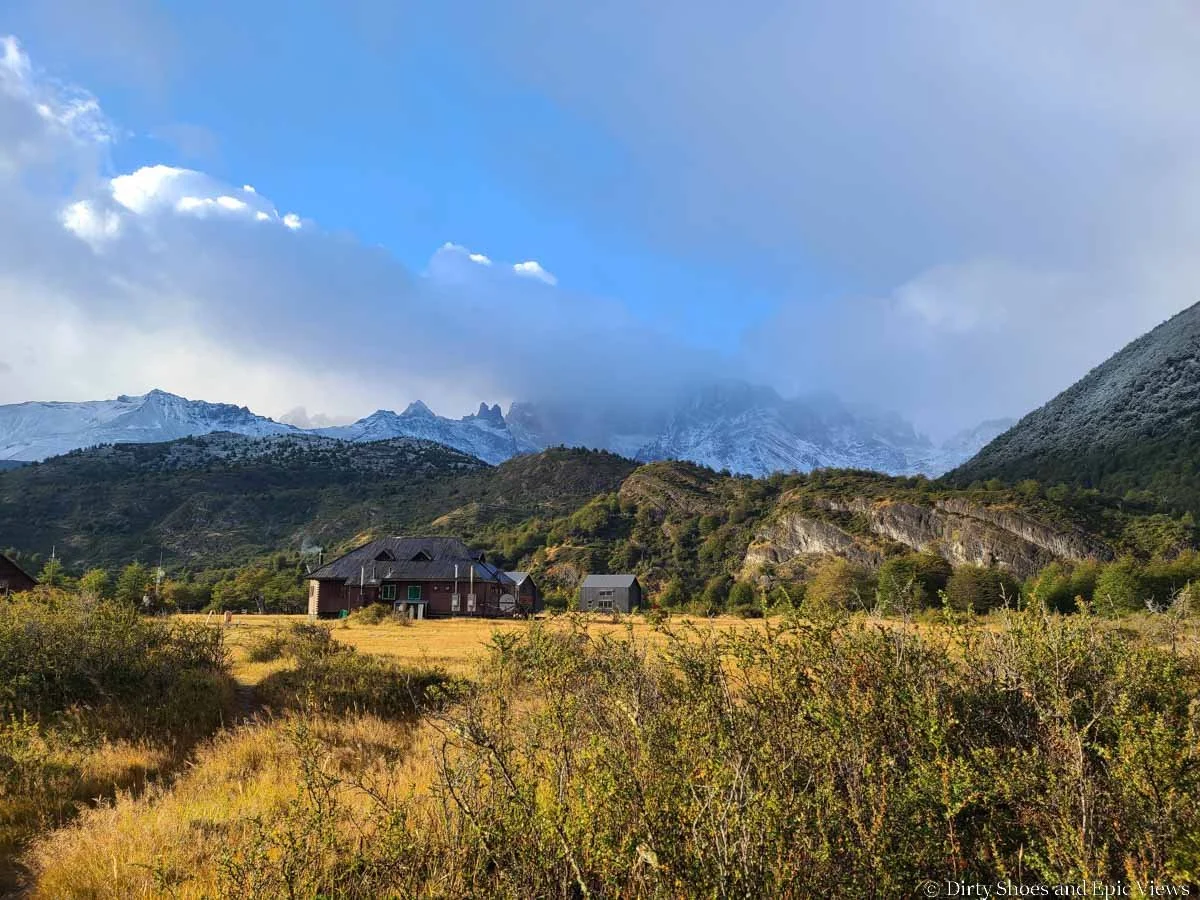
The Dickson Lodge along the O Circuit
The Dickson site is located on the backside of the massif, along the scenic shore of Lake Dickson, with gorgeous mountain views and a glimpse of the Dickson Glacier. The camping area is a mix of wooded sites and open meadow sites.
Amenities: Campground, refuge, shared bathrooms, showers with hot water, bar and mini market, restaurant, cooking shelter

The Dickson Campground on the O Trek

Ahead is the building with a cooking and eating shelter and mini market
Current costs in USD for each accommodation option (we recommend heading to the Vertice site for the most up-to-date information and pricing):
Camping options
Bare site to pitch your own tent: $12 per person per night
Pre- set up 2 person tent: $46 per night
Sleeping bag rental: $29 per person per night
Sleeping mat: $13 per person per night
Towels: $11 per person
Refuge options
Single bed- Has a pillow and mat but no blankets or sleeping bag (so pack your own!): $43 per night
Full bed- Has sheets and comforter: $105 per night
Meal options
Full board (dinner, breakfast the next morning, and a boxed lunch to take with you on the trail): $100
Half board (dinner, breakfast): $68
Breakfast: $30
Lunch: $32
Dinner: $48
Los Perros (campground only)

The entrance to Los Perros Campground on the O Circuit
Los Perros campround is tucked into a forest on the backside of the massif, and is the most remote and rugged of all the campgrounds on the O Circuit. It sits right at the base of the John Gardner Pass.
Amenities: Campground, shared bathrooms, showers (no hot water!) and a sheltered cooking area and minimarket

Sheltered tent sites at Los Perros campground
Current costs in USD for each accommodation option (we recommend heading to the Vertice site for the most up-to-date information and pricing):
Camping options
Bare site to pitch your own tent: $12 per person per night
Pre- set up 2 person tent: $46 per night
Sleeping bag rental: $29 per person per night
Sleeping mat: $13 per person per night
Towels: $11 per person
Grey (campground and refuge)
The refuge and dining area at Grey Campsite and Refuge
This campsite is the first along the O Circuit that is also shared with W Trekkers. It’s located right along the shore of Lago Grey, and is the first campsite you’ll come to after your long day of hiking up and over John Gardner Pass and along the Grey Glacier. W Trekkers use this is a base to hike to closer viewpoints of the glacier. There is a boat dock nearby where some hikers can be dropped off, and it’s also used as the starting point for glacier and kayaking tours.

Tent sites at Grey campsite

Our little tent site in the woods at the Grey Campground
Amenities: Campground, refuge, shared bathrooms, hot showers, cooking shelter, restaurant, bar, mini market, lounge, paid Wifi
Current costs in USD for each accommodation option (we recommend heading to the Vertice site for the most up-to-date information and pricing):
Camping options
Bare site to pitch your own tent: $12 per person per night
Pre- set up 2 person tent: $46 per night
Sleeping bag rental: $29 per person per night
Sleeping mat: $13 per person per night
Towels: $11 per person
Refuge options
Single bed- Has a pillow and mat but no blankets or sleeping bag (so pack your own!): $43 per night
Full bed- Has sheets and comforter: $105 per night
Meal options
Full board (dinner, breakfast the next morning, and a boxed lunch to take with you on the trail): $100
Half board (dinner, breakfast): $68
Breakfast: $30
Lunch: $32
Dinner: $48
Paine Grande (campground and refuge)

The refuge and campsite at Paine Grande on the O Circuit
Paine Grande is one of the largest and most elaborate lodging sites on the O Circuit. It can be accessed by catamaran as it sits right on Lake Pehoe, and is often used as the starting point for many W Trekkers. It’s also a good central location for day hikers and overnighters to hike to the Glacier Grey viewpoints, and to the Frances Valley. Both the refuge and campsites have stunning views of the famous Horns (Cuernos del Paine mountains) along the front of the massif.
Amenities: Refuge, campground, shared bathrooms, hot showers, a nice big cooking shelter, restaurant, bar, minimarket, lounges, paid Wifi

Awesome mountain views from the Paine Grande campground

Breakfast views from Paine Grande campsite and refuge
Current costs in USD for each accommodation option (we recommend heading to the Vertice site for the most up-to-date information and pricing):
Camping options
Bare site to pitch your own tent: $14 per person per night
Pre- set up 2 person tent: $46 per night
Sleeping bag rental: $29 per person per night
Sleeping mat: $13 per person per night
Towels: $11 per person
Refuge options
Single bed- Has a pillow and mat but no blankets or sleeping bag (so pack your own!): $65 per night
Full bed- Has sheets and comforter: $105 per night
Meal options
Full board (dinner, breakfast the next morning, and a boxed lunch to take with you on the trail): $100
Half board (dinner, breakfast): $68
Breakfast: $30
Lunch: $32
Dinner: $48
Frances (campground and refuge)
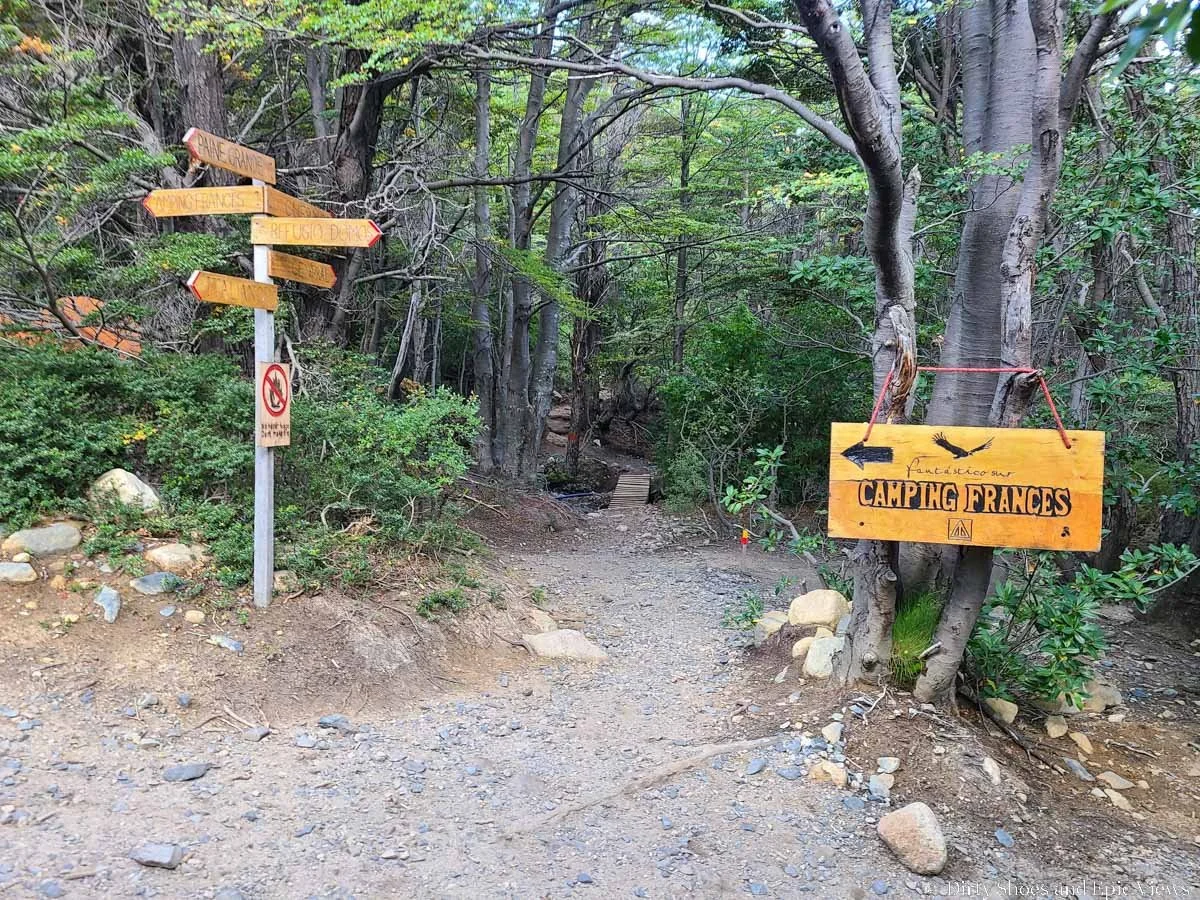
The entrance to the Frances campsite on the O Circuit
The Frances site is tucked into the forest along Lake Nordenskjöld and beneath the front face of the massif. Tent sites here are on elevated platforms throughout the woods and are located on a hill, so the further you are from the central check-in area, the further up the hill your tent will be. Frances was our least favorite campground on the O Circuit- it just seemed congested, small, and loud.
Amenities: Camping sites, a hostel, shared bathrooms, hot showers, a tiny cooking shelter, dishwashing station
The campsites at Frances Campground
Current costs in USD for each of the accommodation options (we recommend heading to the Las Torres site for the most up-to-date information and pricing):
Camping options
Bare site to pitch your own tent: $40-50 per person, depending on the time of year- based on double occupancy. If solo, it’s $70-90. If you wanted to rent a basic 2 person tent for the site instead of carrying your own, it’s an additional $60-65 for a night.
Semi-equipped (simple) Premium Campsite (comes with an elevated tent and a sleeping mat): $105-110 per person for double occupancy, or $190-200 for single occupancy.
Fully equipped Premium Campsite (comes with elevated tent, sleeping bags, sleeping mats, pillows): $140-150 per person for double occupancy, or $250-270 for single occupancy.
Refuge options
Frances has a hostel in the form of domes that each have 8 bunk style beds. These cost $185-207 per person per night.
Meal options
Full board (dinner, breakfast the next morning, and a boxed lunch to take with you on the trail): $130
Half board (dinner, breakfast): $90
Breakfast: $35
Boxed lunch: $40
Dinner: $64
Cuernos (campground and refuge)
The Cuernos campsite and refuge
Cuernos lies not too far past the Frances site at the front of the massif, so it’s likely you’ll pick just one or the other for your stay, rather than both. There are a few types of accommodations here, with views over Lake Nordenskjöld ahead and the mountains behind.
Amenities: Campsites, mountain cabins, a hostel, shared bathrooms, showers, hot water, cooking area
Current costs in USD for each of the accommodation options (we recommend heading to the Las Torres site for the most up-to-date information and pricing):
Camping options
Bare site to pitch your own tent: $40-50 per person, depending on the time of year- based on double occupancy. If solo, it’s $70-90. If you wanted to rent a basic 2 person tent for the site instead of carrying your own, it’s an additional $60-65 for a night.
Semi-equipped (simple) Premium Campsite (comes with an elevated tent and a sleeping mat): $105-110 per person for double occupancy, or $190-200 for single occupancy.
Fully equipped Premium Campsite (comes with elevated tent, sleeping bags, sleeping mats, pillows): $140-150 per person for double occupancy, or $250-270 for single occupancy.
Refuge options
The Cuernos sector has a hostel with rooms that each have 6 bunk style beds. These cost $185-207 per person per night.
This sector also has the option to stay in equipped and heated mountain cabins with rooms that sleep 2-3 people. With 2 people in a cabin, it’s $290-320 per person. Single occupancy is $540-600.

Scenic mountain cabins at Cuernos
Meal options
Full board (dinner, breakfast the next morning, and a boxed lunch to take with you on the trail): $130
Half board (dinner, breakfast): $90
Breakfast: $35
Boxed lunch: $40
Dinner: $64
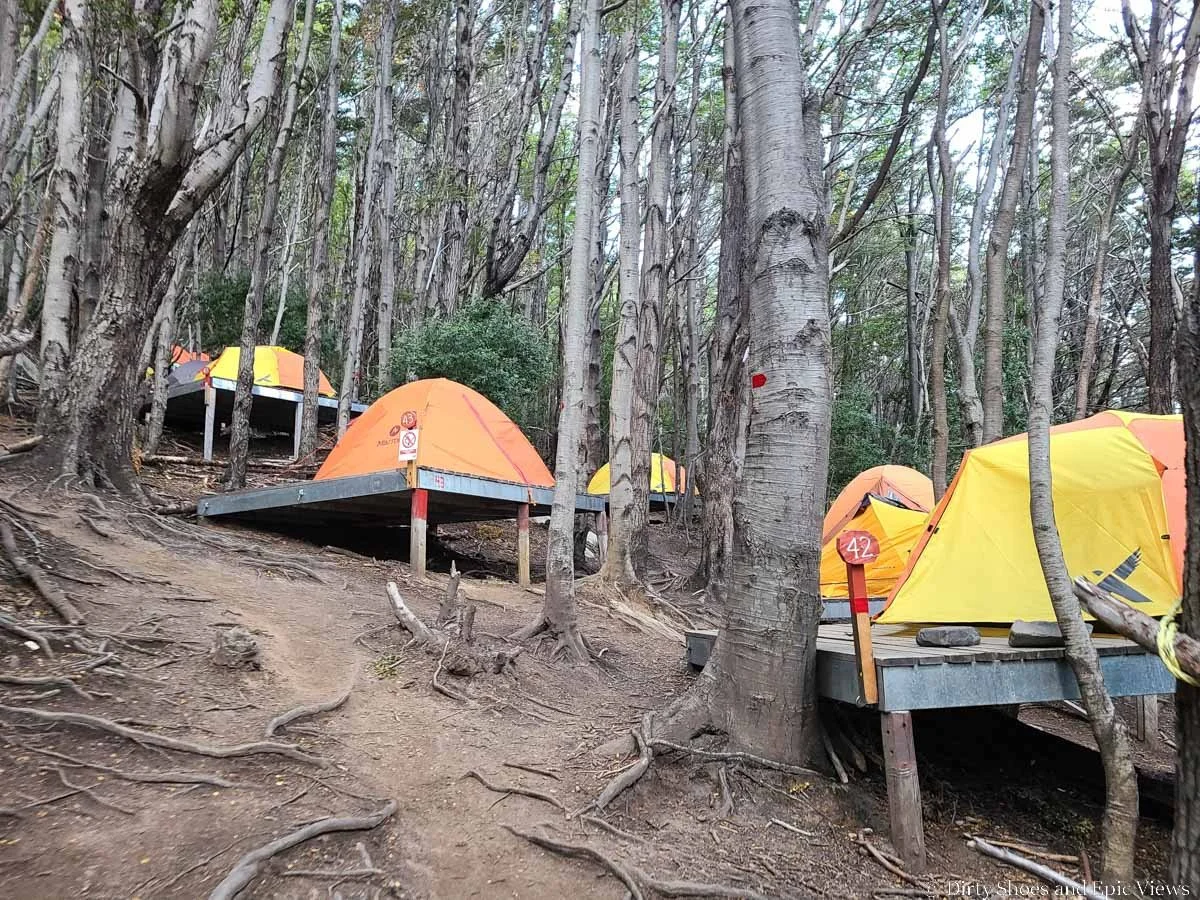
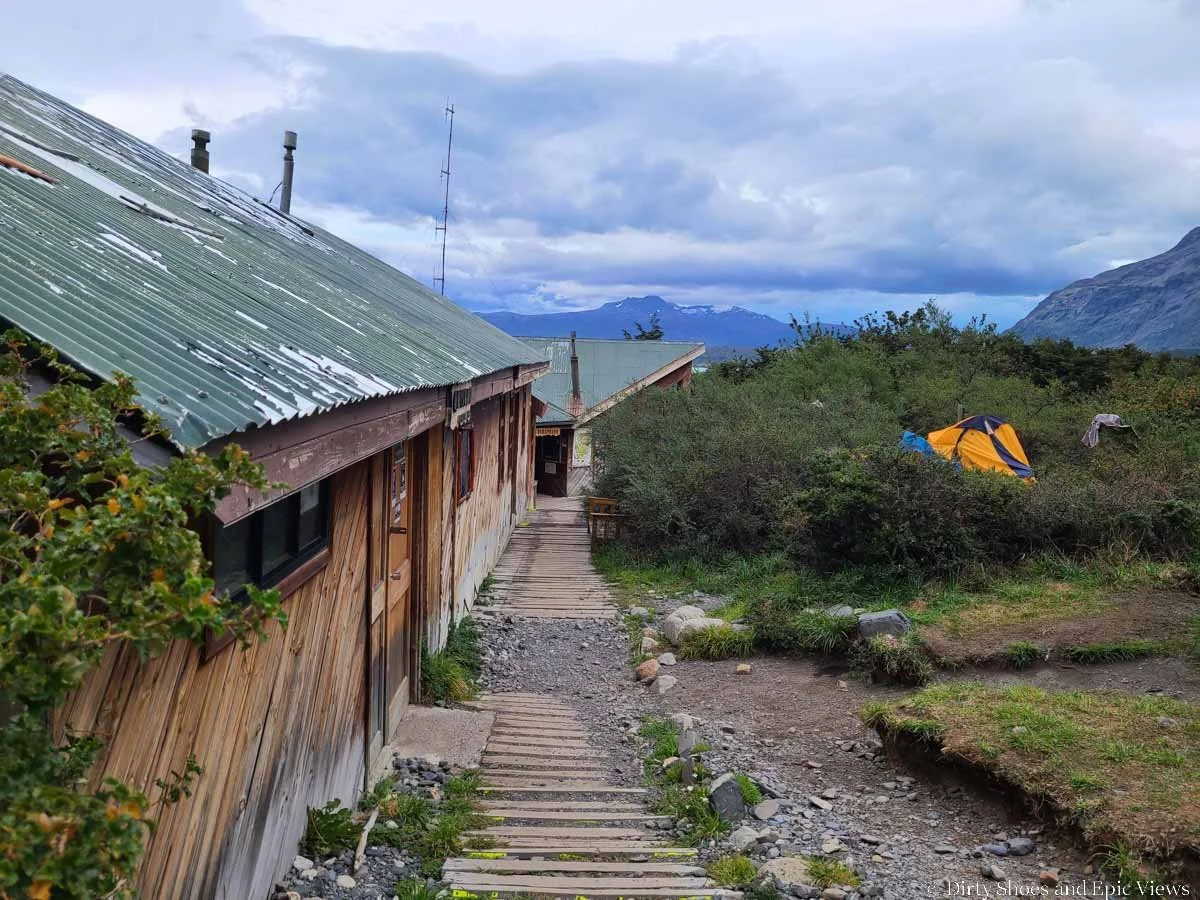
Chileno (campground only)
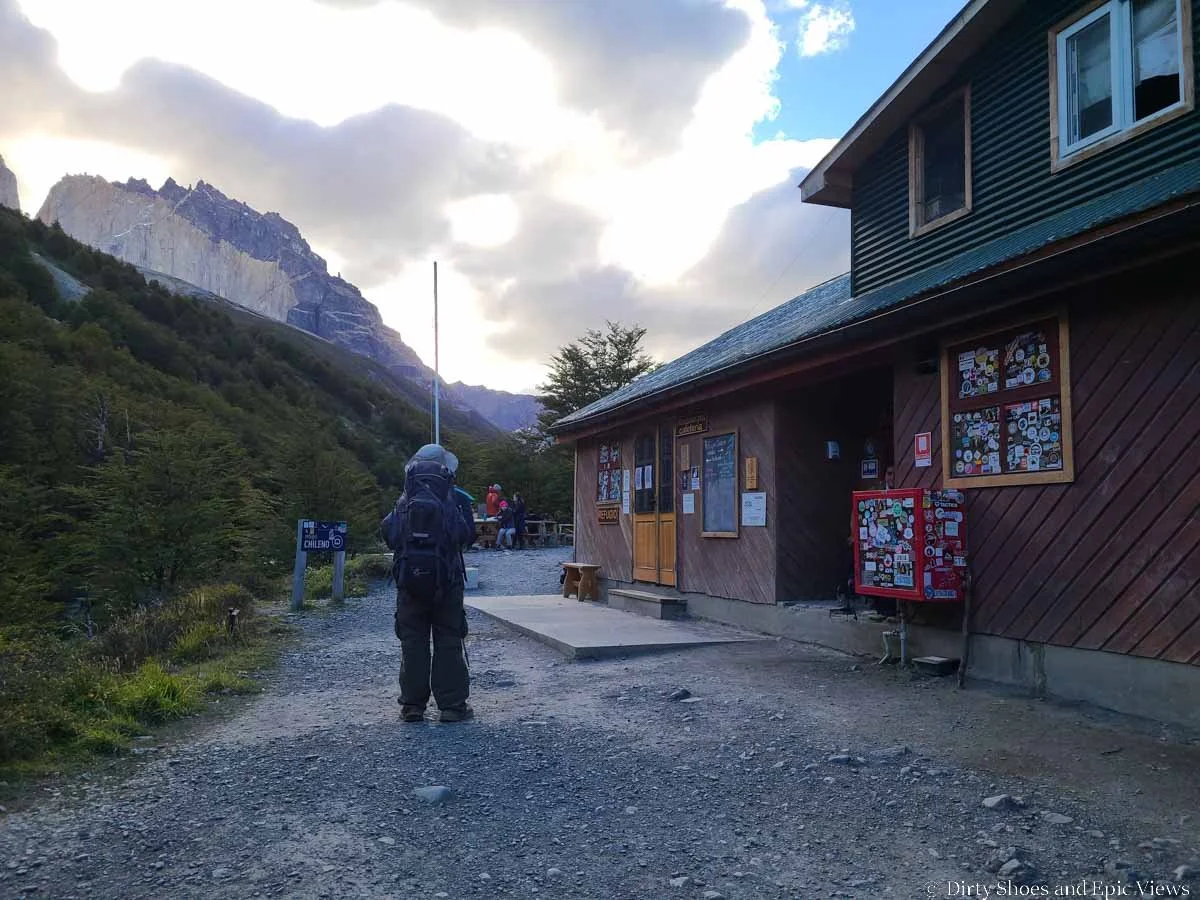
The Chileno campsite
This campground is one of the most popular and sought-after camping areas in the park due simply to its location- right at the base of the Torres del Paine. Tucked deep within a valley in the front the massif, many people (not just O Trekkers or W Trekkers) stay here to get an early start to the Torres, even early enough to catch the sunrise glow off the famous towers. Because of this, it’s often difficult to snag a site here.
This campground is nestled in the woods along a stream. Individual campsites have elevated wood platforms that sit along a steep hill, so you’ll likely have a small workout to get to and from your tent!

Heading to our tent site at Chileno

The view from our campsite at Chileno
The Chileno sector used to have a refuge but this seems unavailable at the moment, so we will only list the camping option here.
Amenities: Campground, indoor dining area, shared bathrooms, showers with hot water.
Current costs in USD for each of the accommodation options (we recommend heading to the Las Torres site for the most up-to-date information and pricing):
Camping options
Bare site to pitch your own tent: $40-50 per person, depending on the time of year- based on double occupancy. If solo, it’s $70-90. If you wanted to rent a basic 2 person tent for the site instead of carrying your own, it’s an additional $60-65 for a night.
Semi-equipped (simple) Premium Campsite (comes with an elevated tent and a sleeping mat): $105-110 per person for double occupancy, or $190-200 for single occupancy.
Fully equipped Premium Campsite (comes with elevated tent, sleeping bags, sleeping mats, pillows): $140-150 per person for double occupancy, or $250-270 for single occupancy.
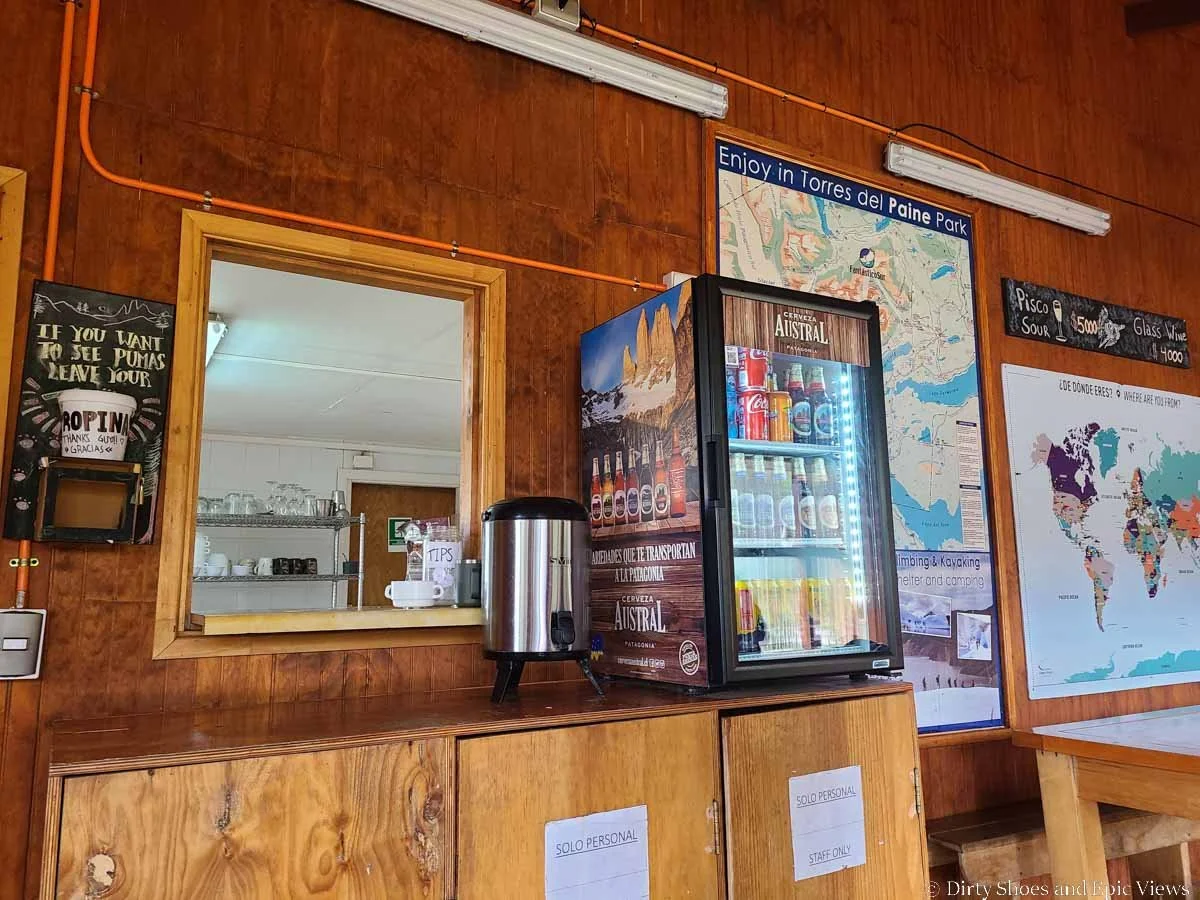
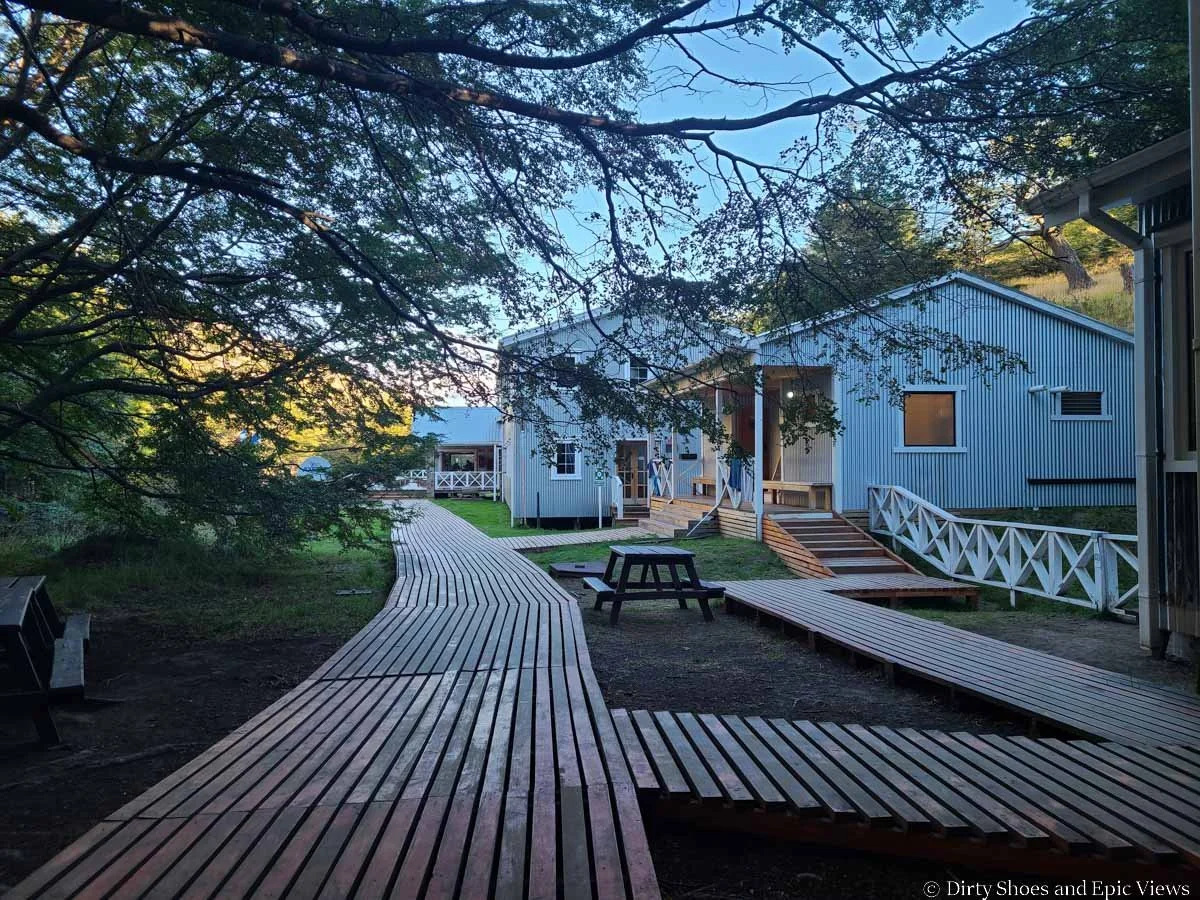
Torres Central (campground and refuge)
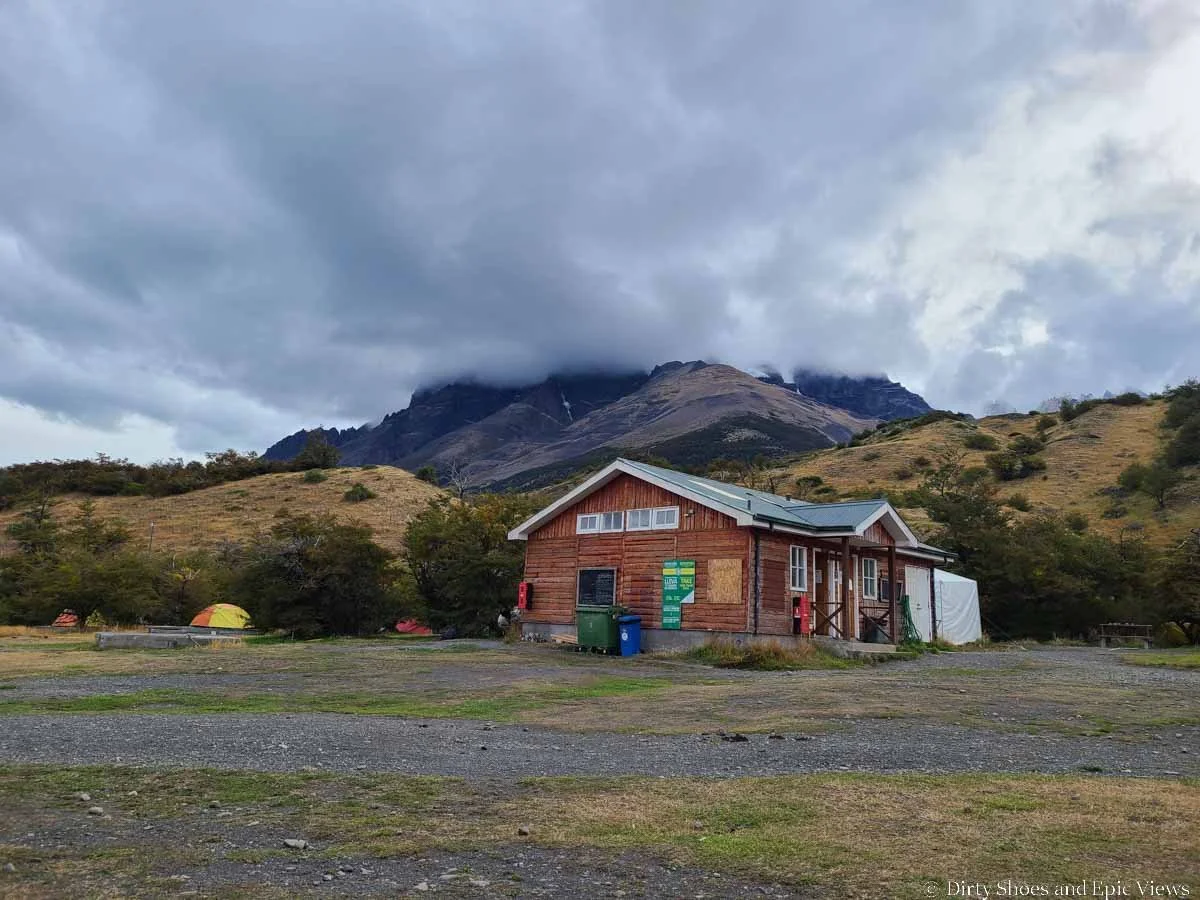
The Central Campsite and Refuge
The Central sector is a central hub of Torres del Paine National Park. Here, you’ll find a large campground, a hostel, and even a hotel, and they are all located right near the Las Torres Welcome Center right at the start of the O Circuit, so there’s no hiking required to get here. If you find that you can’t get a spot at the Chileno campground, the Central site is a good alternative. Though it will be a much longer hike from here to the base of the Torres on your last day on the O Circuit, it’s still the next best location, as it sits right at the start of the day hike for the Torres.
Amenities: Campground, hostel, hotel, Wifi, snacks, restaurant, bar, shared bathrooms, showers with hot water, cooking areas
Current costs in USD for each of the accommodation options (we recommend heading to the Las Torres site for the most up-to-date information and pricing):
Camping options
Bare site to pitch your own tent: $40-50 per person, depending on the time of year- based on double occupancy. If solo, it’s $70-90. If you wanted to rent a basic 2 person tent for the site instead of carrying your own, it’s an additional $60-65 for a night.
Semi-equipped (simple) Premium Campsite (comes with an elevated tent and a sleeping mat): $105-110 per person for double occupancy, or $190-200 for single occupancy.
Fully equipped Premium Campsite (comes with elevated tent, sleeping bags, sleeping mats, pillows): $140-150 per person for double occupancy, or $250-270 for single occupancy.
Refuge options
The Central sector hostel with rooms that have 6 dorm-style beds that cost $185-207 per person per night.
Meal options
Full board (dinner, breakfast the next morning, and a boxed lunch to take with you on the trail): $130
Half board (dinner, breakfast): $90
Breakfast: $35
Boxed lunch: $40
Dinner: $64
This sector also has one of the best hotels in the region, the Hotel Las Torres, which is essentially an all-inclusive luxury hotel right at a prime location in the park. If you want to have a (well-deserved!) relaxing luxury experience when you get off the O Circuit, but expect to pay over $1,000 for a room here!
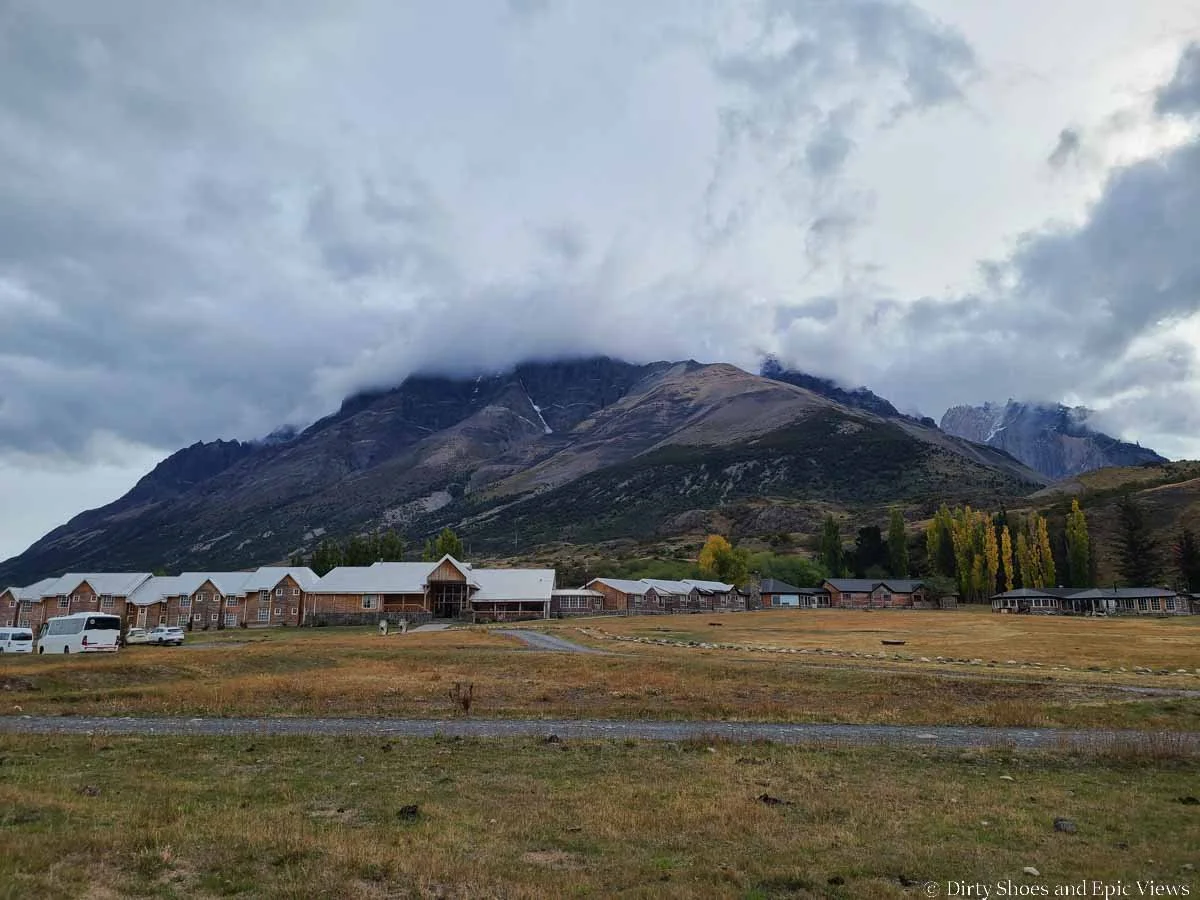
Las Torres Hotel at the start of the O Trek
Map of O Circuit campgrounds and refuges with distances
Here is a map to help you better visualize where all the campsites and refuges on the O Circuit are located, and the distances between them.
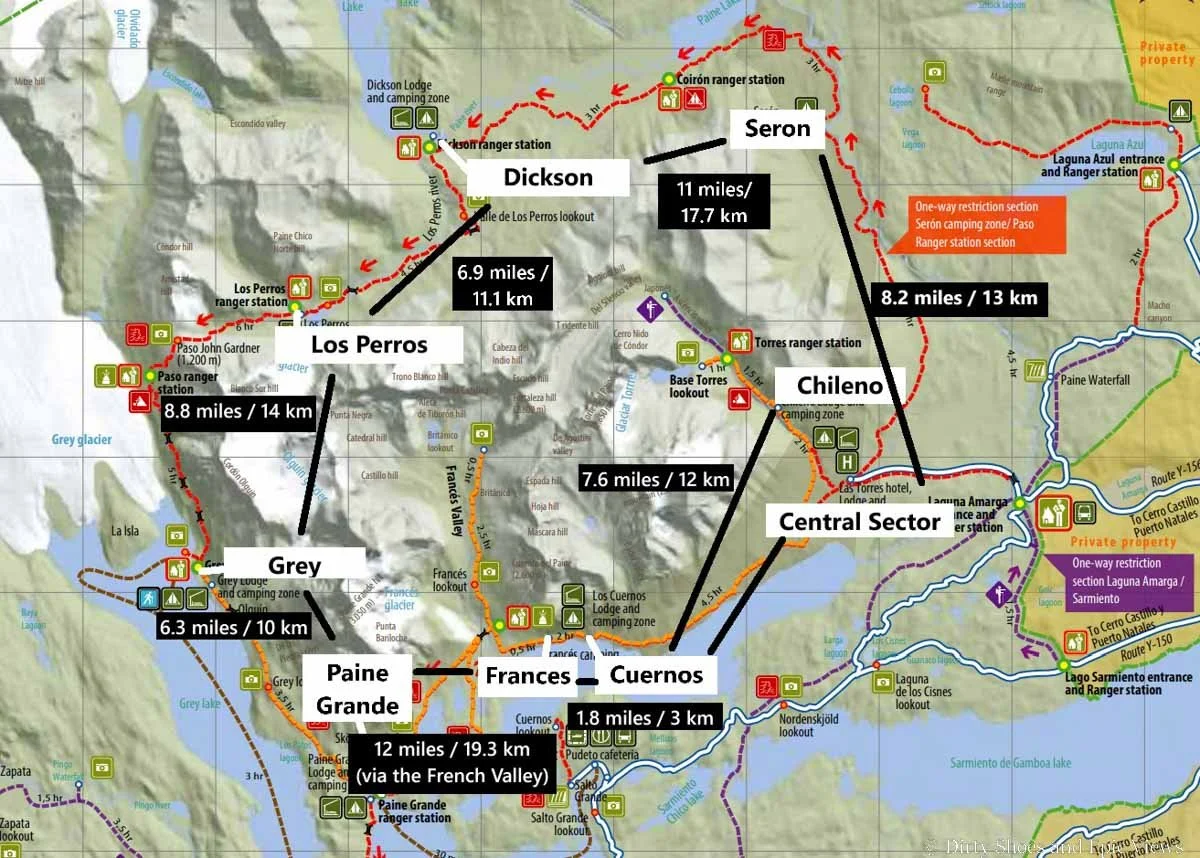
A map of O Circuit camps and refuges with hiking distances between each
How to Book Accommodations and Campsites on the O Circuit
Okay, you know all the options available to you, but how do you book O Circuit campsites and refuges, and perhaps more importantly, when should you do it?
There are a couple different ways you can book O Trek campsites and refuges.
The first way is to go directly through the two companies themselves- Vertice and Las Torres.
Each of these companies are independent from each other, and so the bookings for each open at different times, which makes it kind of annoying because you can’t simply hop on and book everything at the same time.
However, reservations tend to open up sometime in April or May for the following summer (November to March) season (this past season, Vertice opened on April 2nd and Las Torres opened on May 2nd).
We recommend when April hits to keep checking their sites to see when they’ve announced their opening dates. You don’t have to wait for both to open. When the first company opens up their booking process, feel free to book your first set of accommodations. If you can’t get your second set of accommodations that you need to properly complete the O Circuit, you’ll likely be able to cancel the first set with a full refund (be sure to carefully ready their cancellation policy first, though, to confirm!).
Booking directly through the company websites is fairly straightforward and easy. It’s how we did it and we had no issues.
Vertice operates the O Circuit campgrounds that are on the back and west side of the massif: Dickson, Perros, Grey, and Paine Grande.
When you start the booking process, you’ll be asked how many people are in your party, and what trek you are doing (the O Circuit or the W Trek). From there, it will guide you through each of their camping and refuge sites.
If you selected the O Circuit, it is actually mandatory that you stay at Dickson, Perros, and Grey (it basically forces you to select each). That’s because the sites are around the John Garder Pass, and they don’t want anyone taking on more than they can chew- the pass is a huge day. After selecting these three sites, it gives you the option of also staying at Paine Grande (not mandatory).
Once you’ve selected each of the sites, you’ll select the dates you want to stay at each one, the accommodation type you want at each one, and any additional amenities (gear and board) that’s available. Then review all your information and book! Easy peasy.

Here, you can select how many nights at each Vertice campsite along the O Circuit

For each site, you can select accommodation type as well as other amenities like food and gear
The Las Torres website runs Seron, Frances, Cuernos, Chileno and Central, and is pretty straightforward as well. You’ll enter the dates you want, and then for each sector, you can choose from the available accommodation options and amenities.

For each selected area, you can select the accommodation type you want. The system will tell you what is available and unavailable for the date you selected, so you can play around with various dates to see availability at each site.

You can also choose any additional amenities you want for your stay
The Torres Hike reservation system
Using the individual websites above requires that you have a planned out route and know each of the campsites you need to stay at.
If you want to take some of the planning out of the equation, there’s a website called Torres Hike that’s pretty useful when it comes to planning and booking sites for the O Circuit.
On this website, you can put in your desired dates for hiking the O Circuit, and then it will show you several currently available O Circuit itineraries of various days around your desired timeframe. You can filter to only show itineraries for the O Circuit specifically (and not the W Trek) and you can filter based on accommodation types (for example, you can have it only show itineraries where staying at campsites (and not refuges) every night is an option).

A list of potential W and O Trek itineraries and their costs based on the dates selected
When you click on an itinerary, it gives an incredibly useful day-by-day breakdown of the O Trek. It shows different parts of the hike for each day and their individual distances and elevation changes. If there are multiple lodging options in the area, you can choose which one you prefer, and then it will list all available camping and refuge options for the given date and the prices based on the number of people in your group.

When you click on an itinerary, it gives a day by day description of the trek, and allows you to select from the different accommodation option available each night
Once you select an accommodation option, you can then select from extra amenities, like gear and food.

Once you select your accommodation, you can choose from the amenities (food and gear)
If you’re happy with the itinerary, you can book everything directly through this site, which is really convenient.
All in all, the Torres Hike site is a great way to play around with different dates and itineraries and to see real- time availability and prices as you go. The best thing about it is you can see both Las Torres and Vertice sites and book them in one place instead of using two different websites.
Really, the only catch to using this site to book O Circuit campsites and refuges is that they do charge extra nonrefundable booking and payment fees, so it does add an extra expense to an already expensive process, but that extra cost may be worth it for the convenience that the site provides.
Even if don’t want to book through the Torres Hike site directly, we still recommend using the site and playing around with the features to get a better sense of the different O Circuit itineraries you can create, the different accommodation options available, and the hiking distances between each site. We also highly recommend signing up for their mailing list- they give lots of useful information and updates through their emails, and they also let you know when bookings have opened with each company- super useful info!
Regardless of how you book your O Circuit reservations, be sure to save these reservations to your phone, and even print out copies to carry with you on the hike- you will be asked to show these at each site!
How far in advance should you book O Circuit campgrounds and refuges?
Because of the popularity of both the O Circuit and W Trek (which shares several of the campsites and refuges with the O Circuit), it’s recommended to book your trip months in advance. Basically, try to reserve your accommodation for the O Circuit within a few days of the reservation systems opening. There are limited spaces, and they can go pretty quickly. Or at the very least, one type of accommodation, such as campsites, can go quick, and you might be left with only the very expensive options (which is what we usually see). This is especially true for the peak season months of December, January, and February. We did the O Circuit in mid-March, and we were able to snag all our necessary sites in early January, but this may have been a (very lucky) fluke, and we wouldn’t advice waiting that long.
One of our biggest tips for booking O Circuit campsites, and one that we think really helped us, is to be as flexible as you can. Don’t go in with strict dates. Have a broad window, and base the rest of your trip, flights, etc off when you can get O Circuit reservations.
In our experience, the Chileno campsite is the hardest to get, since it sits right at the base of the Torres, making it popular for O Trekkers, W Trekkers, and overnighters trying to get to the Torres for sunrise. We are writing this guide in late May, and currently only see Chileno availability in the last week of the following March! So these sites do book out fast.
You might need to start with the availability of that campsite and work from there by playing around with different dates.
If you simply cannot find a date at Chileno that works for your timeframe, you can always stay at the Torres Central campsite or hostel. This is a huge site, so there will likely be something available. Staying here for your last night on the O Circuit will add some more mileage to your hike, as it’s a little bit of detour to go back to Central versus just hiking directly up to Chileno for your last night, but you gotta do what you gotta do, right?
A huge majority of our fellow O Circuit cohort were unable to get Chileno and had to detour down to Central for the last night. Most of them did still manage the early wake-up call to try and catch sunrise at the Torres- it’s just a much earlier day and longer hike.
Another option if you couldn’t get a spot at Chileno would be to start your O Circuit by essentially day hiking to the base of the Torres on your first day, spending that night at the Central sector, and then on day 2, continue around the O Circuit as normal.
How to Plan an O Circuit Itinerary
To plan out your O Circuit itinerary, a good first step would be to take a look at the campsites above and the distances between them. Decide where you want to start, what you think you can tackle each day, and decide if you do want to make the two side trips into Frances Valley and to the Torres (our opinion: you absolutely should), and then plan from there.
Because of the way the campsites and refuges are laid out, and due to the fact that the O Circuit is a one-way loop, an O Circuit itinerary is pretty much laid out for you. The campsites are well-spaced out in terms of distances so you’ll need to stay at most of them along the hike. There are a few instances where you might be able to skip one here or there to shorten the number of days needed on the trail if you are a strong backpacker, but most people will take about 8 days to do the O Circuit.
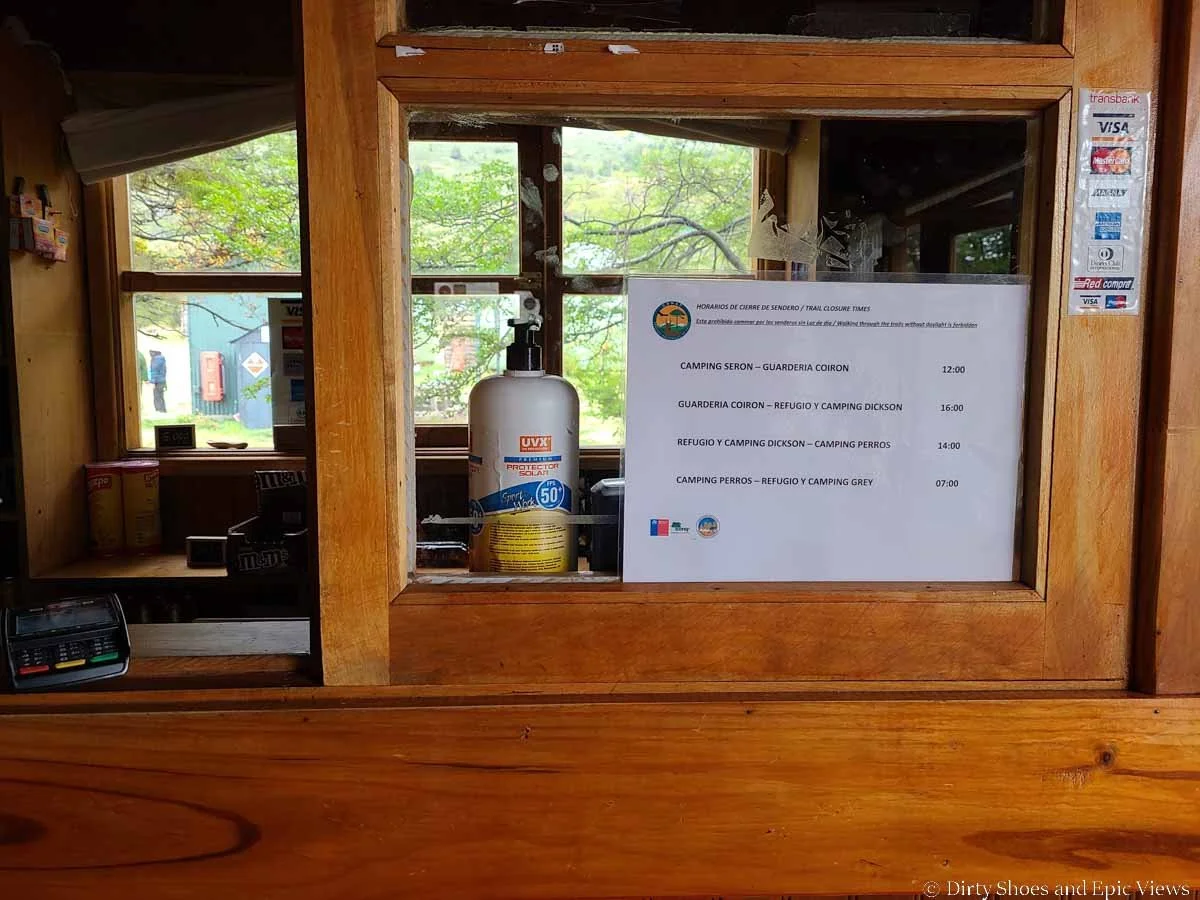
Trail closure times are posted at the various campgrounds and ranger stations on the O Circuit
8 day O Circuit itinerary
We think that 8 days is an ideal amount of time to hike the O Circuit, and it’s a pretty standard way to tackle this trek.
Here is our suggested 8 day O Circuit itinerary, starting and ending at Las Torres region. After, we’ll briefly go over some alternatives and ways you can shorten this itinerary.
For each day of this itinerary, we’ll give a brief description of the trail, but for much more info and details on each section of the O Circuit, be sure to head over to our comprehensive O Circuit trail guide! There, you’ll find more trail details and pictures for each section of the O Trek.
Las Torres region to Seron
Distance: 13.1 km / 8.17 miles
Elevation Gain: 336 m / 1101 ft
Elevation Loss: 306 m / 1004 ft
Time: 4.5 hours
The first day on the O Circuit from Las Torres region to Seron is relatively short and easy. It’s a good first day on the trail to get your backpacking muscles warmed up and ready for the challenges ahead, which is why we would recommend starting the O Circuit here if you can!
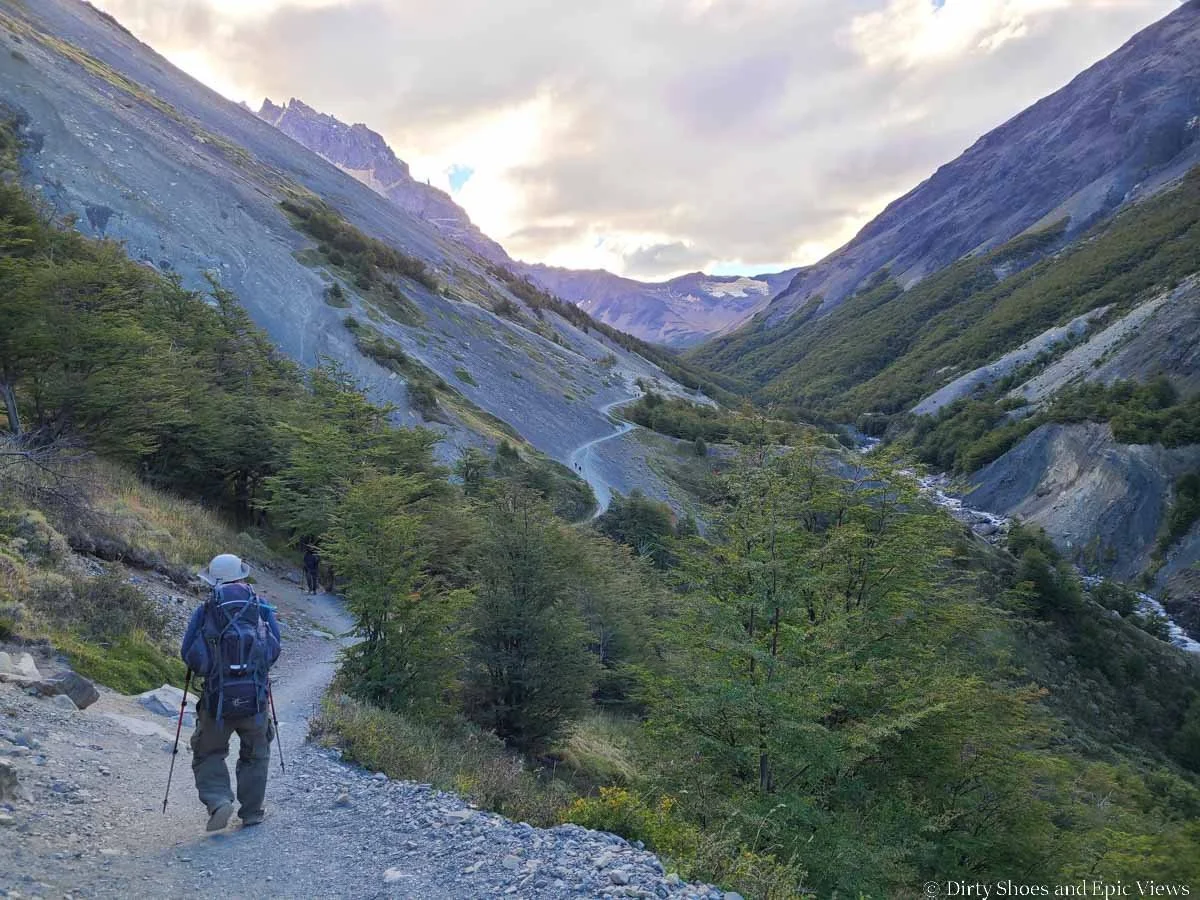
From the Welcome Center at Las Torres, you’ll be greeted by mountain views along the front of the massif, and then start your day on the O Circuit by climbing gradually through the rolling hills at the base of the mountains.
Hiking along the foothills along the front of the Cordillera del Paine massif on the first day of the O Circuit
The trail will duck in and out of the forest as you steadily climb, and as you wrap around to the east side of the massif, views will open up to the sprawling Patagonian landscape of meadows, rivers, hills, and forest. This side of the massif is quite remote and quiet, so you’ll likely have a lot of solitude here- enjoy it!

Descending into the valley towards the Seron campsite
The day ends with a steady descent down into the valley, followed by a nice flat walk through the meadows to the Seron campsite. You’ll set up camp here in a flat meadow tucked between rolling hills beneath the eastern side of the Cordillera del Paine massif.
Seron to Dickson
Distance: 17.7 km / 11 miles
Elevation Gain: 425 m / 1395 ft
Elevation loss: 379 m / 1242 ft
Time: 7 hours
The second day of the O Circuit is a bit longer. The first half of the hike involves climbing up and over a pass that has absolutely gorgeous views over the electric blue Lake Paine. But for us, this pass also had the most insane and strongest wind we had ever experienced- so be prepared!
Hiking above Lake Paine after crossing through the windy pass!
Once over the pass, a steady descent alongside the lake brings you to the Coiron ranger station- a good midway point to rest and eat some lunch.
From here, the hike eases up as you walk a relatively easy path through meadows, with gorgeous views of the backside of the Cordillera del Paine massif.

Hiking along the backside of the massif towards the Dickson campsite
One final short but steep ascent and descent over a small hill will spill you out to Dickson camp and refuge, where you’ll spend the night alongside Lake Dickson and views of the gorgeous Dickson Glacier.
Dickson to Los Perros
Distance: 11.1 km / 6.91 miles
Elevation Gain: 468 m / 1537 ft
Elevation Loss: 115 m / 377 ft
Time: 5 hours
The hike to Los Perros campground is technically a short day on the trails, but don’t let today’s shorter distance fool you- it’s a pretty tiring day.
Today, you’ll basically be starting the climb up towards the infamous John Garnder Pass (which you’ll be hiking up tomorrow). Today is a lot of steep and steady climbs up into a colder, harsher, more alpine environment on the backside of the massif.
From Dickson, the climbing starts off immediately through the forest, with some great viewpoints back towards Dickson Lake and Glacier and the surrounding peaks.

Views from the trail back over Dickson Lake and Glacier

Beautiful views of the massif on the hike towards Los Perros Glacier
Once out of the forest, the trail transitions onto a steep and rocky moraine that tops off at a stunning viewpoint of Los Perros Glacier and Lake. Up here, the elements can be harsh- for us, it was freezing cold, windy, rainy, and even snowy, and this combined with the steep climbing made for the most exhausting day on the trails thus far, despite the shorter distance.

Ascending the moraine to Los Perros Glacier

Los Perros Glacier
You’ll end the day at Los Perros Campground, with campsites that are fortunately very well-sheltered from the elements. Make sure to get a good night’s rest here, because tomorrow is the longest and most challenging day of the O Circuit!
Los Perros to Grey
Distance: 14.2 km / 8.8 miles
Elevation Gain: 847 m / 2779 ft
Elevation Loss: 1312 m / 4306 ft
Time: 11 hours
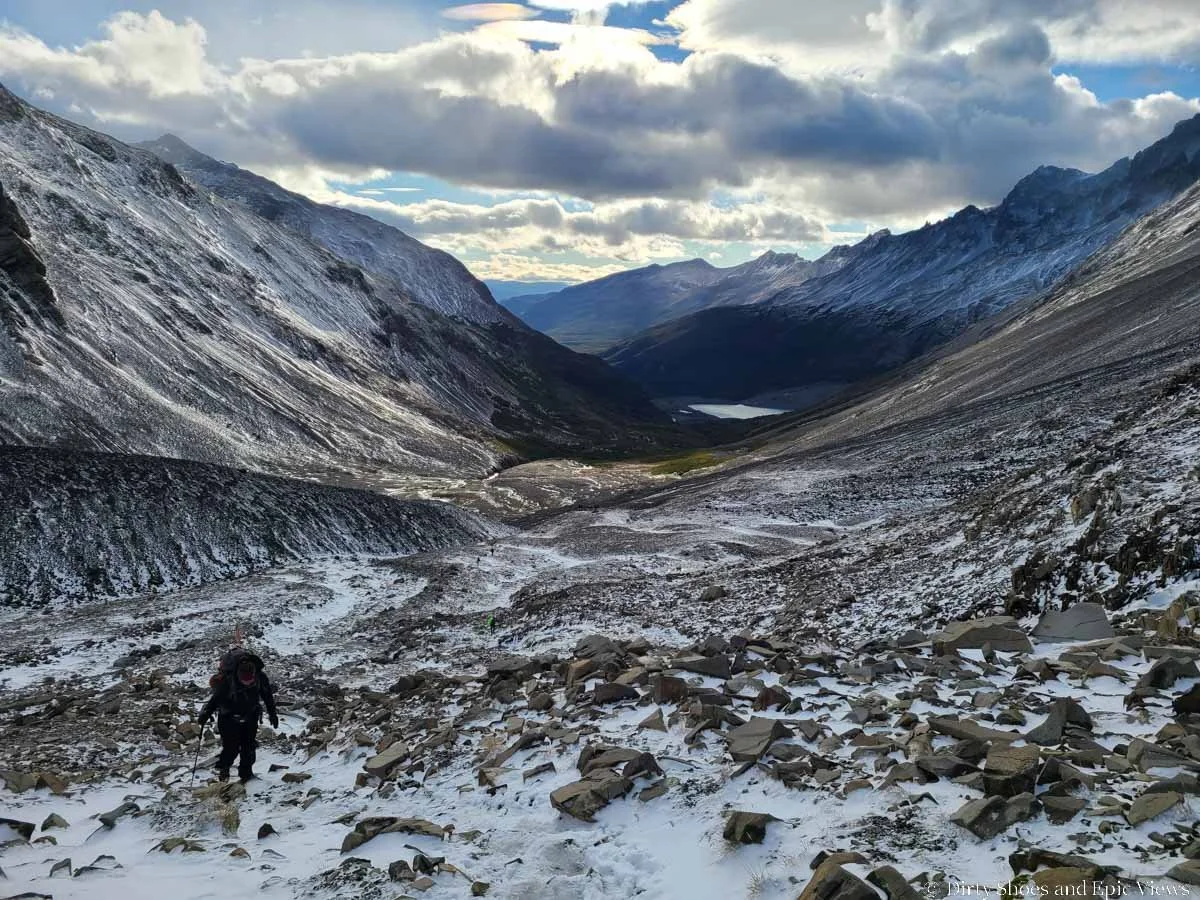
Today is the biggest and most challenging day of the O Circuit. You’ll start off in the dark (since they boot you out of camp by 7 am!) climbing a steep and rugged path through the forest for about an hour or so until you emerge out of the tree line. Views will open up as you enter a rocky alpine environment with beautiful mountain views surrounding you as the sun rises over the peaks.

Ascending the rocky trail to John Gardner Pass

Navigating the rocky and snowy terrain beneath John Gardner Pass
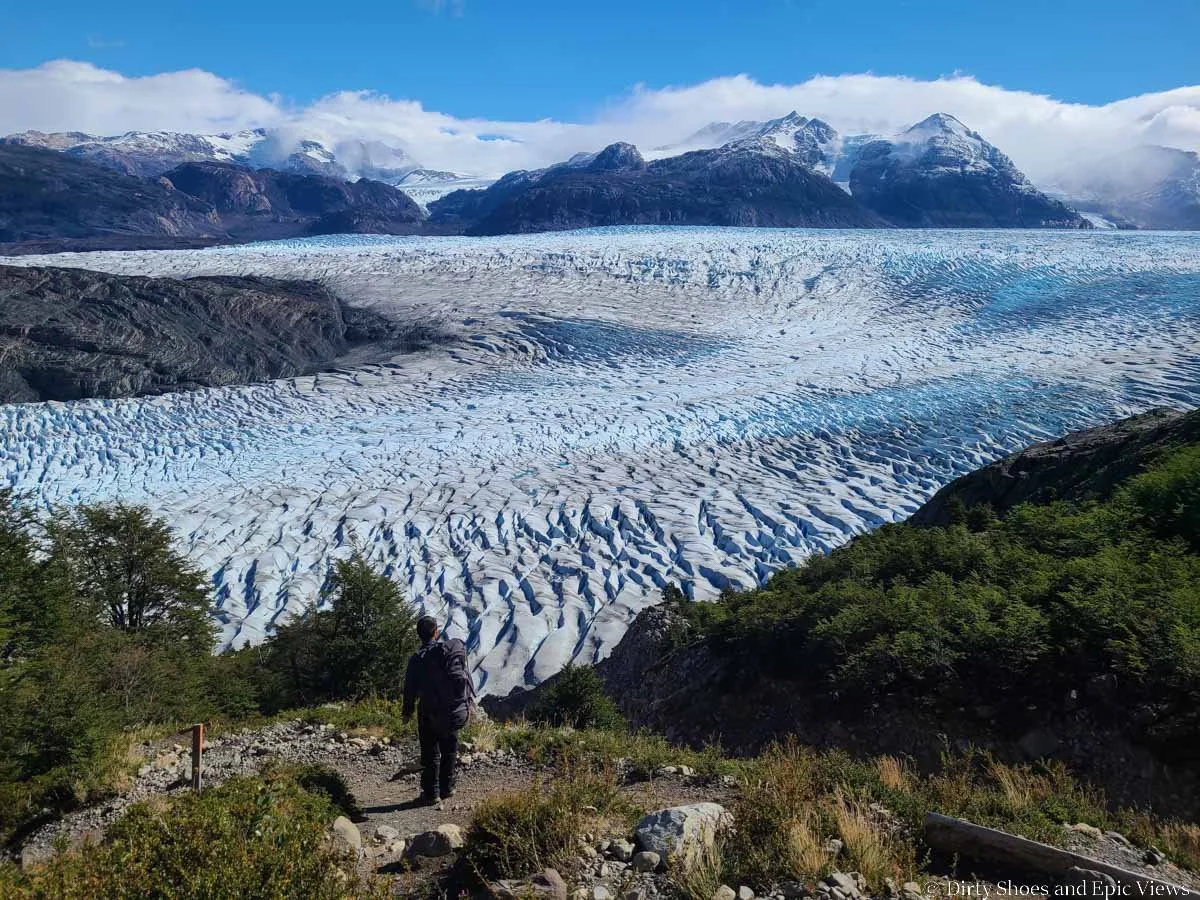
It’s a long, steep, rocky, and relentless climb to the top of John Gardner Pass, but the reward at the top is so worth it, and your jaw will literally drop when Glacier Grey comes into view.
As you steeply descend down the other side of the pass, the views of the glacier just keep getting better and better until you hit tree line.

Descending off John Gardner Pass with epic views of the Grey Glacier
The descent through the forest is pretty tough- it’s steep, it’s rugged, and it’s very tiring and hard on the knees as you drop thousands of feet in just over a mile. For us, the climb down was definitely harder than the climb up the pass!

Descending from John Gardner Pass
Once the majority of the descent is done, though, you can take a quick break at the Paso Campground and checkpoint, and from here, the path is mostly rolling ups and downs, with amazing views over Lake Grey and Glacier Grey for most of the rest of the hike- this section was one of our favorites of the whole O Circuit!
Views of Grey Glacier from the O Circuit
Along the way, you’ll cross three scenic suspension bridges, and a few short detours to great viewpoints over Glacier Grey.

There are a few scenic suspension bridges on this part of the O Trek
It will likely take between 10 to 11 hours to hike all the way to Grey Campground, so it’s a long day on the trail today, and certainly the hardest, but the views the entire day are also some of the best on the entire O Circuit!
Grey to Paine Grande
Distance: 10.2 km / 6.34 miles
Elevation Gain: 341 m / 1120 ft
Elevation Loss: 383 m / 1256 ft
Time: 4.5 hours
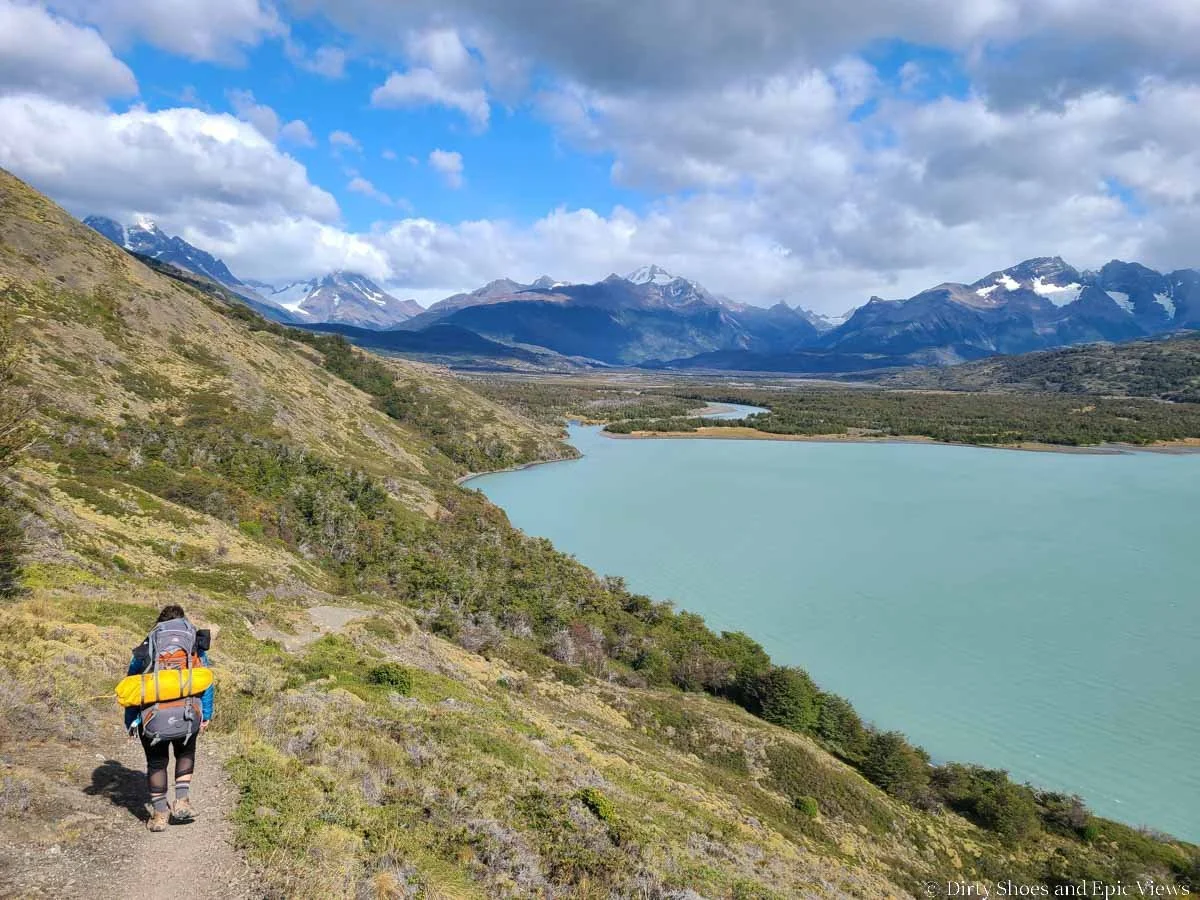
You’ll be happy to hear that after yesterday’s challenging day on the trail, Day 5 on the O Circuit is actually relatively quick and easy. There’s still a bit of climbing and descending (that’s par for the course with the O Circuit), but it’s a much shorter day with much less climbing (and of course, it still has all the epic views).
The first half of the hike to Paine Grande is an overall uphill hike across the hillsides above Lake Grey. You’ll be surrounded by lake views on one side, and the mountains of the Cordillera del Paine massif on the other.
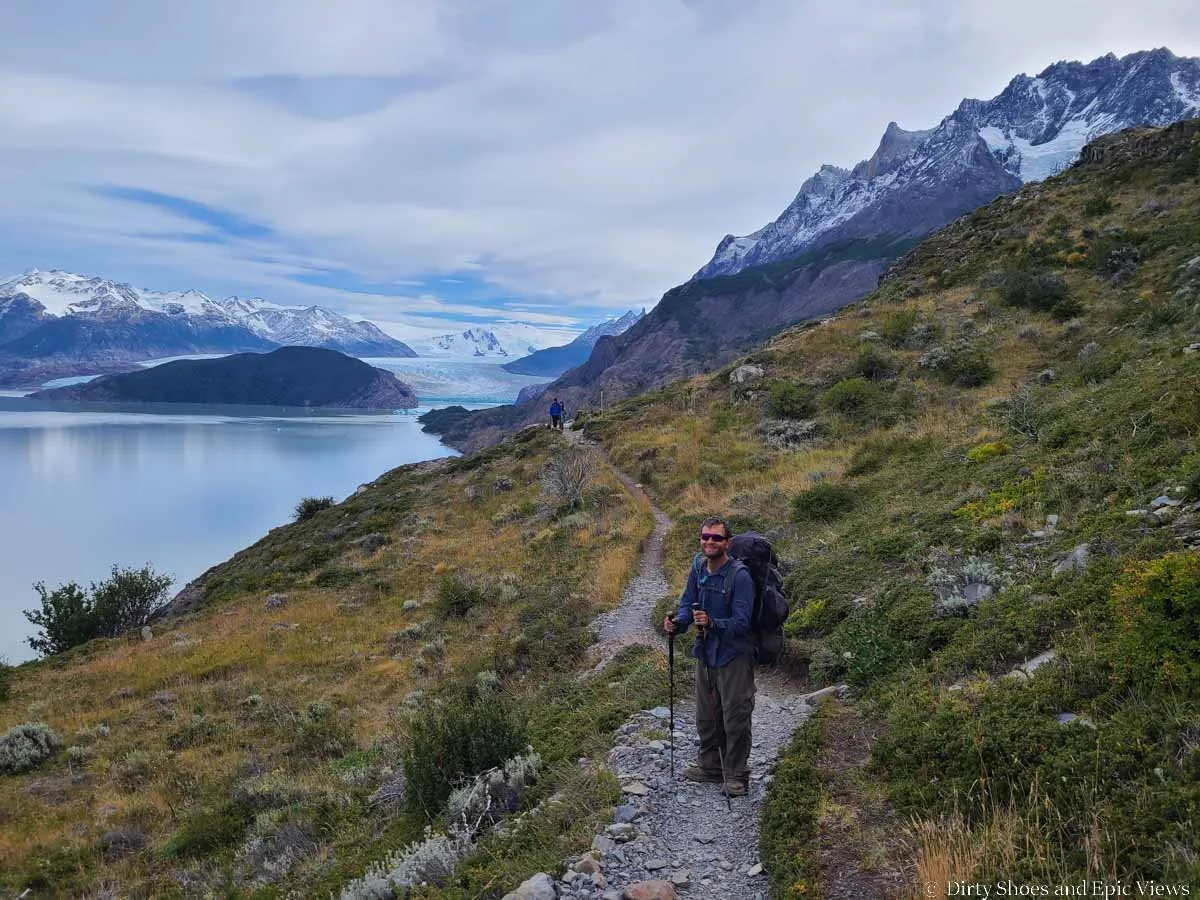
Hiking on the western side of the O Circuit with now distant views of the Grey Glacier
Once you top out on the climb about halfway into the hike, you’ll get your final views of the distant Glacier Grey.
Then, the path starts its gradual descent down to Paine Grande at the shore of Lake Pehoe.

Hiking towards Paine Grande
Grande to Frances (or Cuernos)
Distance: 19.3 km / 12 miles
Elevation Gain: 851 m / 2971 ft
Elevation Loss: 731 m / 2397 ft
Time: 9 hours
Even though today is the longest day distance-wise on the O Circuit, it’s not the hardest. Don’t get us wrong, though- it’s still a long day on the trail, but luckily, most of it will be without your heavy pack!
The day starts off from Paine Grande on an easy trail that meanders up and down the rolling hills in front of the massif. It’s a pretty easy start, and very scenic as you are hiking directly towards the iconic Horns of Torres del Paine.

Hiking towards the Horns and the French Valley along the front of the O Circuit
After about 4.5 miles, you’ll come to the Italiano campsite and ranger station at the base of the French Valley. Here, you can drop your heavy packs and prepare for an out-and-back day hike up to two stunning viewpoints in the valley.
It’s a steep and steady climb for most of the 3.5 miles into the valley, but the views are worth it. You’ll see the French Glacier up-close, and be able to hear it thunder and crack throughout the valley. And you’ll end the hike at the Britanico Lookout, which has stunning panoramic views of the massif, the Horns, and the lakes and valleys below.
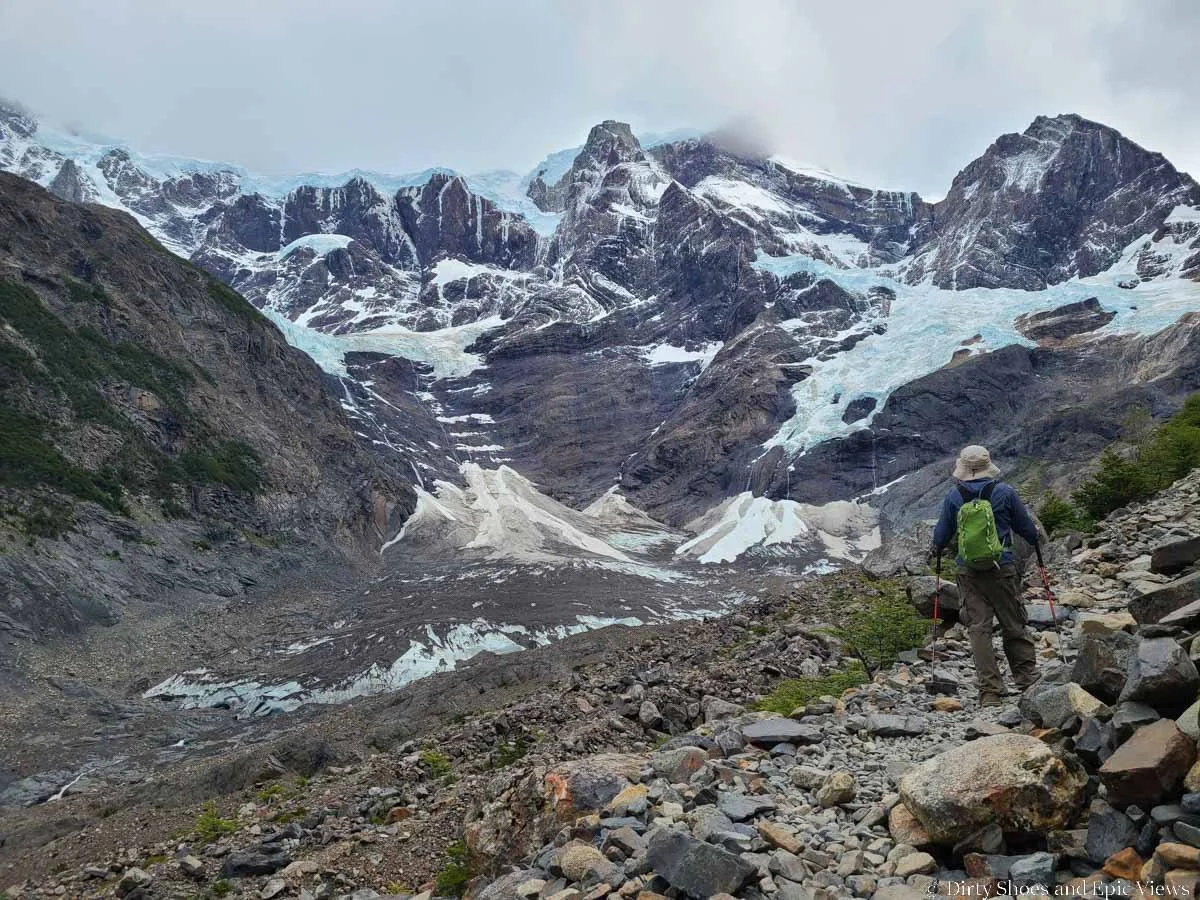
Hiking past the French Glacier on the O Trek

Enjoying the views at Mirador Britanico
Retrace your steps all the way back down to Italiano, grab your pack, and then hike the final 20 minutes or so to Frances Campground. If you couldn’t get a spot here, Cuernos is another 3 kilometers, or almost 2 miles, away.
Frances to Chileno
Distance: 15.1 km / 9.38 miles
Elevation Gain: 702 m / 2303 ft
Elevation Loss: 454 m / 1490 ft
Time: 7 hours
Today is another long trail day, made challenging really just by the fact that you’re on day 7 of the O Circuit and you’ll probably start to feel it.
This part of the trail is a long stretch across rolling hills, with lots of ups and downs on the way, and at least for me, this really started getting to me!
The views along this stretch are really pretty, but they don’t change too much. You’ll be walking between the cliffs on the front side of the massif, and Lake Nordenskjold, which is a beautiful blue lake that runs along most of the front side of the massif.

Hiking along the rolling hills of Torres del Paine

Non-stop views over Lake Nordenskjold
Eventually, after a gradual climb, the path will turn into the Ascencio Valley, where the famous Torres del Paine are hidden. You’ll walk deeper into the valley on a narrow path along the rocky slopes above the valley as you gradually climb up to Windy Pass. And just a head’s up- there’s a reason for this name.
When we hiked this, it was insanely windy, with gusts reaching up to 69 km/hr (or so we were told later that night at camp). The winds made it super hard to walk forward here, and dirt and gravel from the trail was whipping up at us with every gust. However, it didn’t last long, and once we started down the other side of the pass, things calmed down.
Descending to Chileno campground after crossing Windy Pass
From the pass, it’s a long gradual descent to Chileno, which sits nestled in the valley in the woods along a steam. From here, you can just barely see the tip of the Torres peeking out above the mountains, but it’s enough to get you excited for the next day!
Chileno to the base of the Torres del Paine and hike back to Central
Distance: 13.4 km / 8.34 miles
Elevation Gain: 643 m / 2108 ft gain
Elevation Loss: 1099 m / 3605 ft
Time: 6 hours
Today is the day! The grand finale of the O Circuit and the chance to see the iconic and epic Torres del Paine that make this part of Patagonia so famous.
Lots of people camp at Chileno in order to get an early start and catch the orange glow of sunrise on the Torres, but for us, the morning was rainy and overcast, so we weren’t too concerned about getting a super early start.
At Chileno, continue with just your daypack. You’ll cross the nearby stream on a couple of small footbridges and start a gradual and easy climb through the forest until you get to the Torres ranger station.
At this point, the trail can close for weather or dangerous conditions (as it did on the day we hiked here- we just happened to hike up early enough before the trail closed!), but the trail also closes here daily at 2 pm for the safety of hikers who need to get back down before dark.
From this station, the trail becomes very steep, rugged and rocky as it begins climbing the moraine beneath the Torres. The trail will duck in and out of short trees and shrubs, and you’ll start getting glimpses of the Torres peeking up over the top of the moraine ahead.
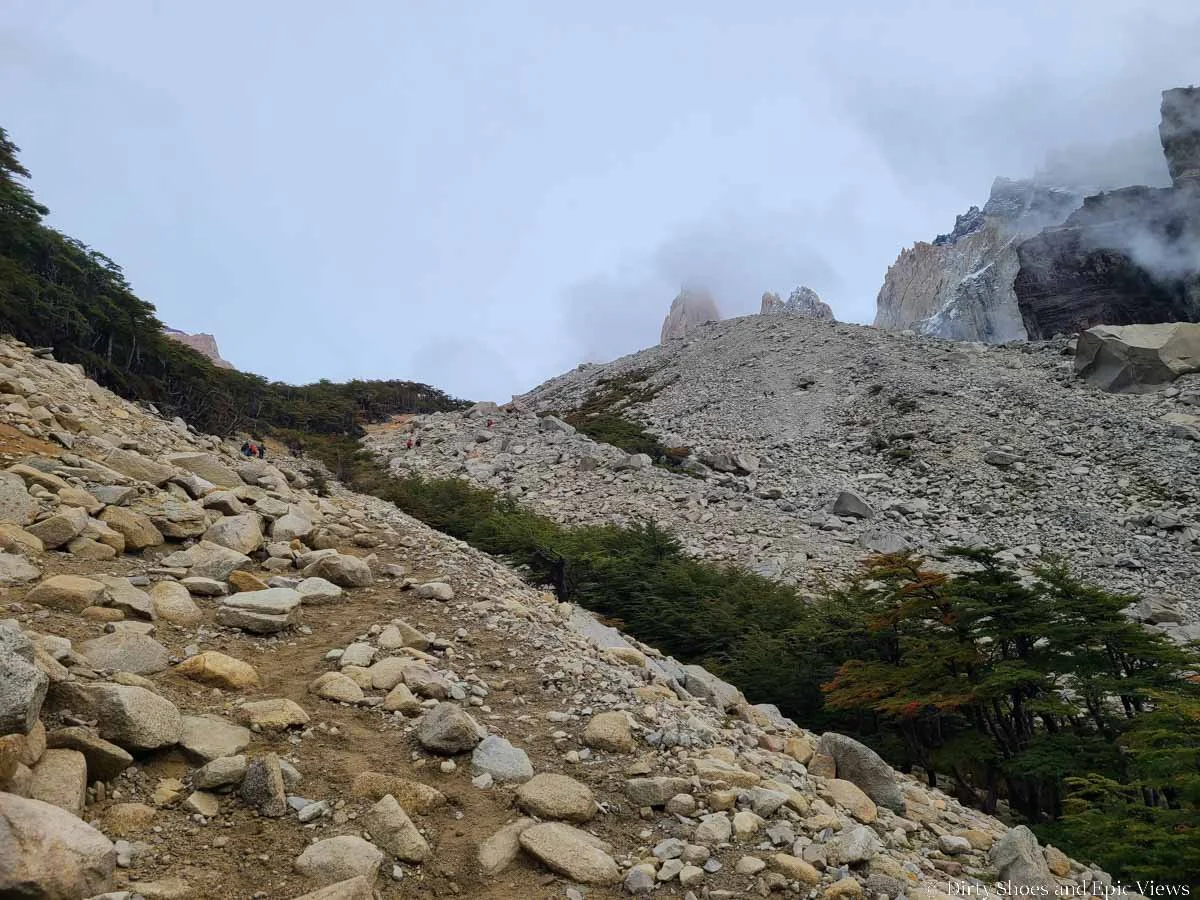
The Torres will start to peak out over the moraine!
Once completely above the tree line, the path steeply climbs a maze of rocks and boulders, with poles, blazes and signs to help keep you on track. It’s only about a half hour of climbing on this exposed moraine, but it does get quite steep.

Navigating the boulder field on the way up to the base of the Towers
The trail will spill you out right at the iconic lake at the base of the Torres del Paine- a reward for all your hard work and effort over the past 8 days on the O Circuit. Soak up your time here and enjoy these epic views!
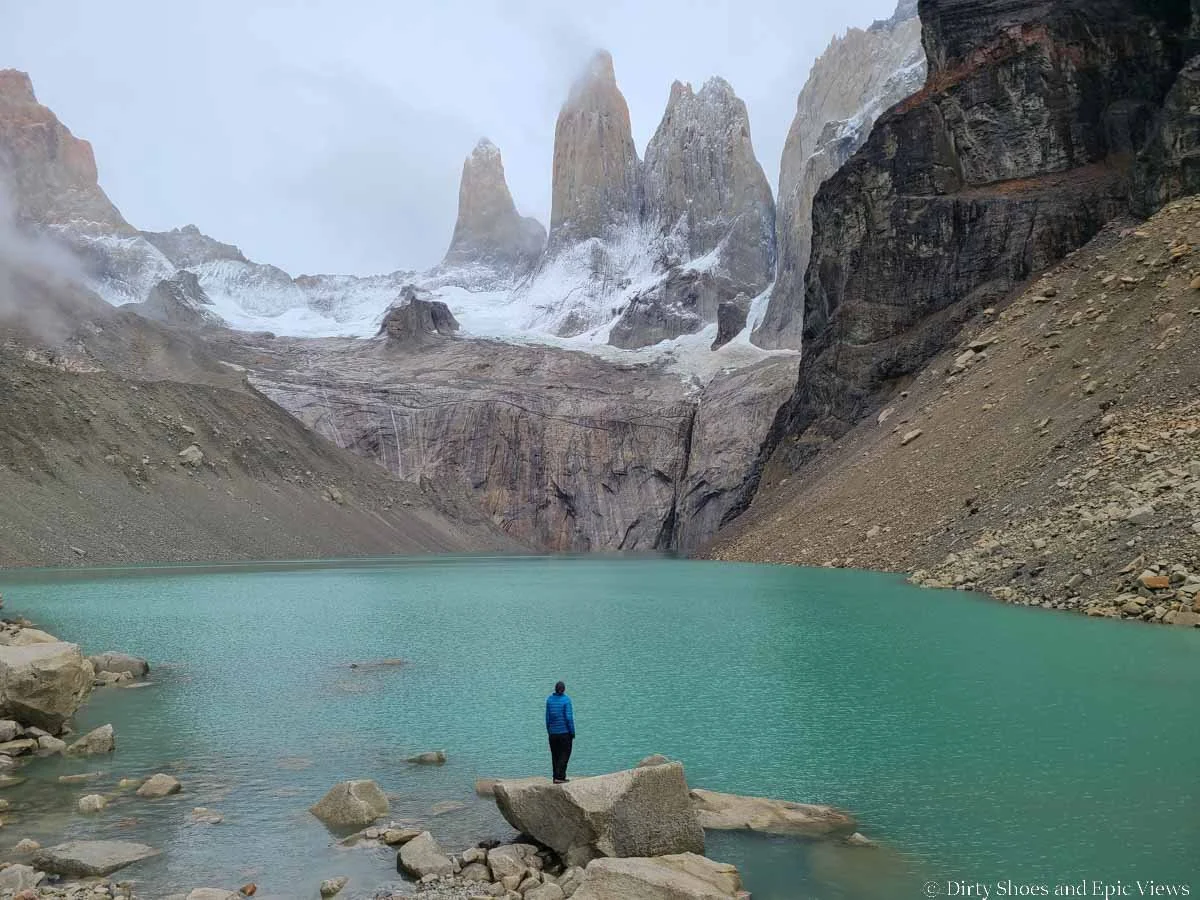
The epic Torres del Paine! A great grand finale to the O Circuit.
When you’re ready, retrace your steps back to Chileno. Grab your gear, and start the long steady descent back down to the Central sector/ Las Torres region where you started your trek 8 days ago.
Congratulations- you finished the O Circuit!
Ways to shorten this O Circuit itinerary
While the 8 day O Circuit itinerary is pretty standard, you can shorten the trek by a day if you have less time or just can’t book certain campsites or accommodations.
The best way to do this is to skip the out and back hike into the French Valley. While this isn’t recommended or ideal, as the French Valley is one of the highlights of the O Circuit, it will help you save a day if needed. From Grey, skip camping at Paine Grande and head right to Frances Campground without going up the French Valley. This hiking day will be about 11.3 miles across a lot of rolling terrain.
You could also skip camping at Frances or Cuernos and hike from Paine Grande straight to Chileno, which would make for a very long day, at about 14 miles.
You could also simply skip the hike up to the base of the Torres at the end, and save it for another time (you could potentially head back to the park another day if you are still in the area before or after your trek to do a day hike to the Torres on its own).
How Much Does it Cost to Hike the O Circuit in Torres del Paine?
While hiking is often a no to low cost activity, the O Circuit is quite an expensive trail to hike (and they’ve even gone up quite a bit since we’ve done the hike ourselves!). Between parks fees, campsite or refuge reservations, food, gear, and transportation, all the costs really add up.
However, how you plan your time on the O Circuit- what accommodations you choose, and whether you carry your own food and gear- will really determine how much the O Circuit will cost you, and an O Circuit budget can vary substantially.
Carrying your own tent, gear, and food might make the trek harder, but you will save a lot of money, and will feel more accomplished at the end!
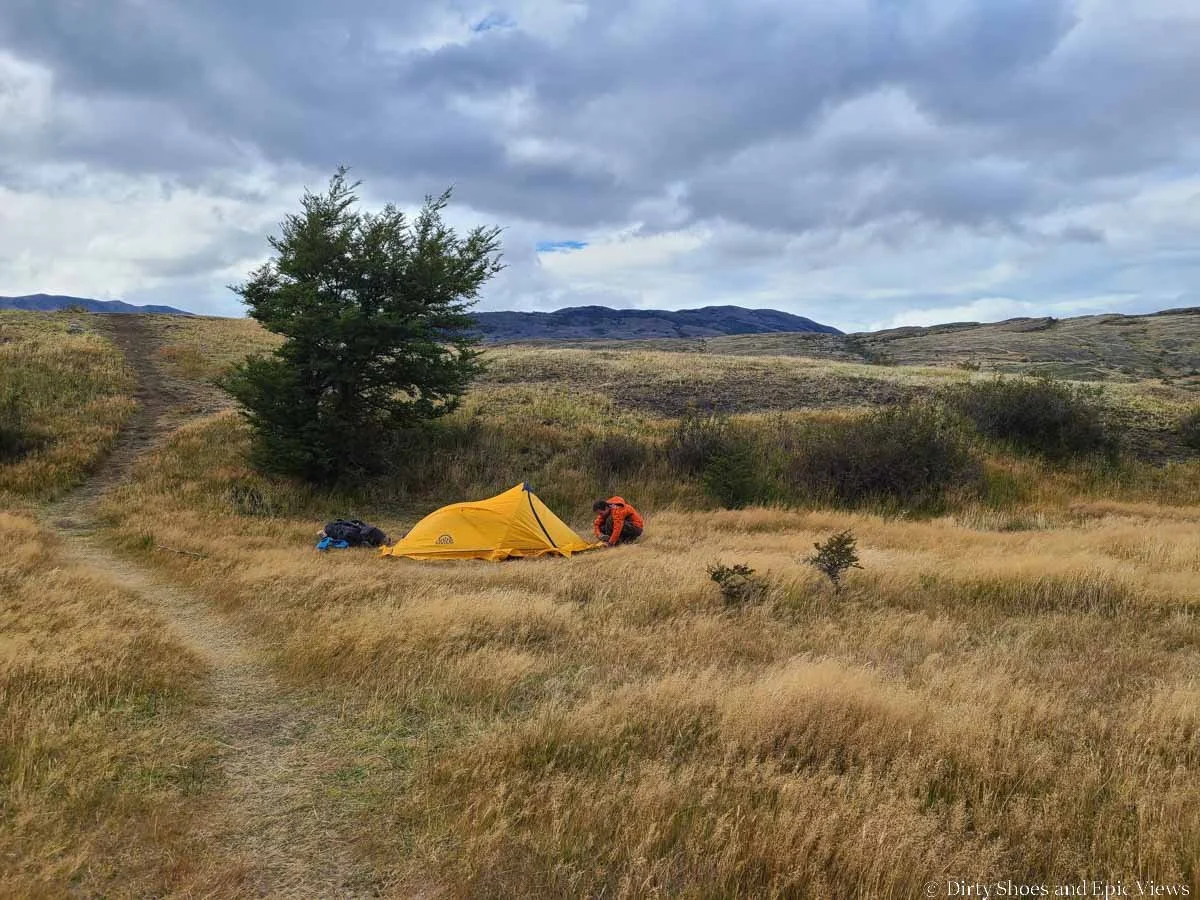
Camping with your own gear and making all your own meals can save you lots of money on the O Circuit!
To give you an idea of what an O Circuit budget might look like, here are the two extremes of the spectrum- one in which you’d bring everything you need, setting up your own tent at each site and cooking all your own meals, and one in which you stay in fully equipped rooms (or fully equipped tent sites when rooms aren’t an option) and pay for full board at each site.
These costs are in USD and are per person and based on two people sharing costs during peak season. It’s also based on a 7 night/8 day hike.
Lowest O Circuit budget (camping only, carrying all gear and food):
Roundtrip transportation costs between Punta Arenas, Puerto Natales, and Torres del Paine: $58 (factor in more if you need to take the ferry to start at Paine Grande)
Park fee: $50
Gear rental from Puerto Natales: $100
Food: $30
Campsites: $200
Total: $380
Not cheap for a hike, but this is about as cheap as you can get it! If you bring your own gear with you from home, you can eliminate the rental costs we list above, but these will probably just be replaced by airline baggage fees.
Highest O Circuit budget (staying in fully equipped refuges or camping sites with full board):
Roundtrip transportation costs between Punta Arenas, Puerto Natales, and Torres del Paine: $58 (factor in more if you need to take the ferry to start at Paine Grande)
Park fee: $50
Food: $700
Lodging: $887
Total: $1695
Yikes! See, this stuff quickly adds up.
Fortunately, it doesn’t have to be that expensive. Your O Circuit costs could lie anywhere in between these two extremes depending on what combination of gear and food you buy along the way.
What to Pack for the O Circuit
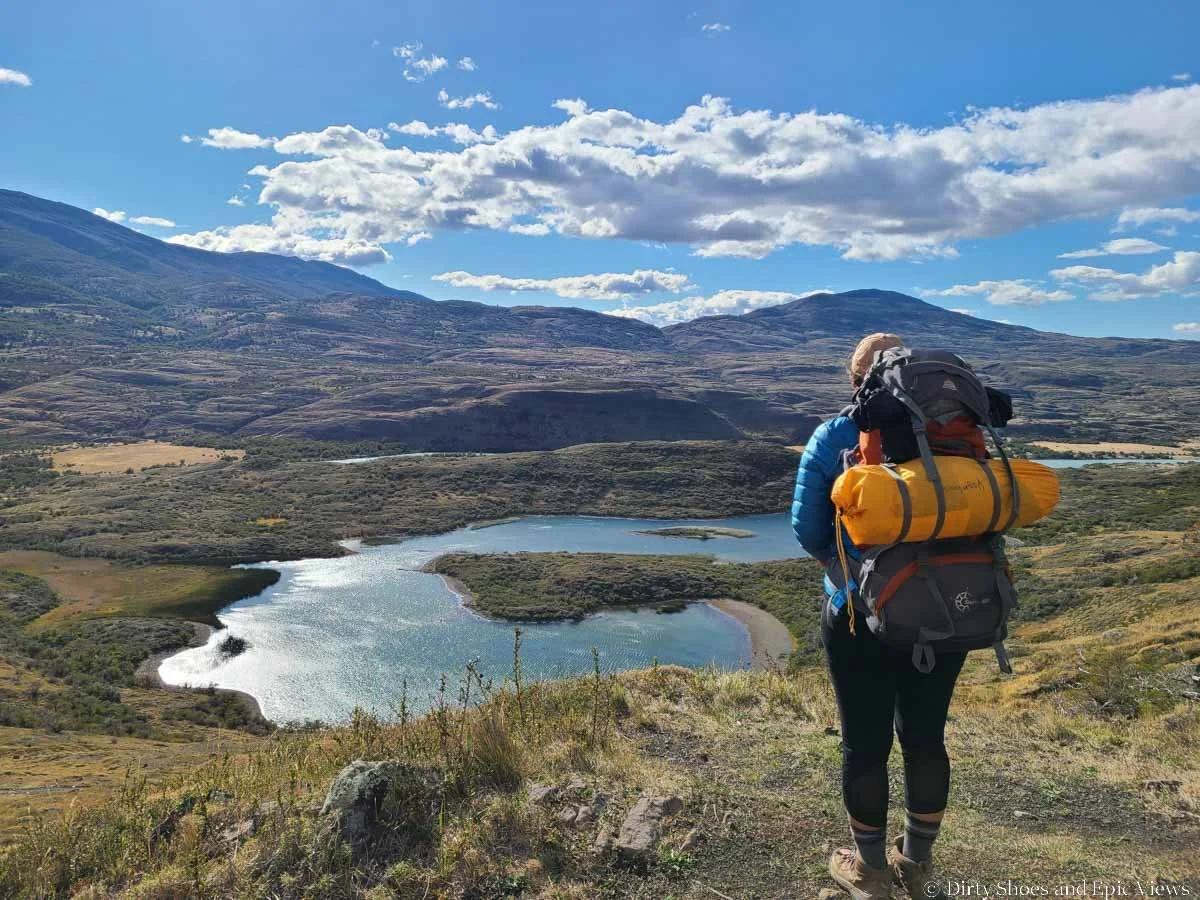
Aside from all the standard backpacking and hiking gear, here are some things we’d highlight for packing specifically for the O Circuit.
Rain gear- No matter what time of year you hike the O Circuit, be prepared for lots of rain. Pack a rain jacket and pack cover at minimum, but we also suggest having rain pants, and dry bags to keep belongings safe inside your pack. We also recommend having waterproof hiking boots as well to keep your feet dry.
Layers- It can get quite cold (and windy!) at night and up on various passes throughout the O Circuit. Make sure to have warm base layers and windproof outer layers. A hat and gloves are also handy too for the cool evenings at camp.
Sun protection- Make sure to bring a hat or sunglasses and sunscreen for the trail’s sunny days and exposed areas.
A buff or bandanna- Or some other thing that can be used as a face covering to protect yourself in high wind areas. The wind can often blow sharp dirt and gravel up at your face, and sometimes the wind can be so strong that it can be hard to breathe as you’re trying to walk into the headwind, so having a face covering will be a big help here. Also, have a small pack of tissues on hand (your nose will get really runny!).
Trekking poles- I usually don’t hike with trekking poles, but even I would highly recommend having them for the O Circuit, particularly for the hike up and down John Gardner Pass. The pass can get quite slick with snow and slush at certain times of year, especially on steep sections, and poles are useful to keep your balance. Also, the descent off the backside of the pass is super steep and rugged, and poles are a huge help here as well, and may save your knees just a little bit.
Headlamp- You will definitely find yourself hiking in the dark on the O Circuit, as you must leave the Los Perros Campground by 7am at the latest to start your hike up the pass, so make sure you have a good headlamp!
Ear plugs- Campsites on the O Circuit are cramped, and you’ll have close neighbors. If you’re in a refuge instead, you’ll be sharing a room with others. Things can get loud, especially in sites shared by the W Trek, so ear plugs might help you get a better night’s sleep.
Cash or card- Most of the accommodation sites on the O Circuit have small camp stores to buy food and gear, so it’s helpful to have some emergency cash on you in case you need anything along the way.
Portable charger- All accommodations on the O Circuit do have outlets and electricity for charging devices, but these can be quickly taken by others, and electricity is usually turned off at night, so we still recommend having your own portable charger to be able to charge on the go and when needed.
All necessary documentation- At each campsite along the O Circuit, you’ll be required to check in and show your camping reservations, passport, and PDI tourist card. Make sure to have all reservations saved to your phone (and even better-printed out and carried with you).
Gear rental for the O Circuit
Need to rent camping gear for the O Circuit? While you can pay to have a tent set up for you at each campsite, that is an expensive option. Plus, we might be crazy here, but we wanted the accomplishment of making the O Circuit a true backpacking experience and carrying all of our own gear with us.
The problem was that we didn’t want to pack all of our gear from home. It would cost us a lot in baggage fees, but we also just didn’t want to lug it around for the several months we’d be in South America.
Luckily, there are several places around Puerto Natales where you can rent gear- backpacks, sleeping bags, sleeping mats, pillows, camp stoves, tents, complete camping kits, and more.
Rental Natales is a popular option for gear rental in Puerto Natales.
Erratic Rock is popular hostel that also rents out gear. It was often recommended to us that we go to their daily 3 pm talks that cover lots of useful information about the O and W Treks, but when we visited them, the staff told us that they don’t really do that anymore and that they were actually going to be closing up shop soon. He was honest and told us that most of their gear was pretty old, well- worn and out dated, but he was still happy to answer any questions we had about the trek. It does seem like their website is still up and running so I am not sure if they are still in business or not, but it might be good to have a back-up plan in case it’s not.
We ended up renting gear from the Yagan House. We were able to rental all the gear we needed- a tent, sleeping bags, and mats, the day before our trek for a reasonable price. The gear wasn’t in too bad of shape, but we could never fully adjust our backpacks perfectly, which made the trek a bit rougher than we would have liked (the cons of having to rent your gear!).

We got all our rental gear for the O Circuit at Yagan House in Puerto Natales
More Patagonia Guides
Are you looking for more information on the O Circuit, the W Trek or Patagonia in general? Be sure to check out all our other guides to help you plan your perfect trip!
We hope this guide to the O Circuit helps you plan your perfect trek through Torres del Paine. The O Trek was definitely one of our favorite backpacking trips to date, and we hope you all can experience it as well! Let us know if you have any questions in the comments below- we are happy to help.